We all aspire to capture that perfect shot. However, sometimes unwanted objects or distractions make their way into our photos. Thankfully, modern photo editing software equipped with advanced tools can help us remove these imperfections effortlessly. In this guide, we’ll explore how to remove objects from photos using some of the best tools available in Windows 11.
Method 1. Using the Windows Photos app
First of all, we can use Windows's built-in app to deal with unwanted objects from images.
1. Right-click on the target image, select Open with Photos.
2. Then, press Ctrl + E to edit in Photos.
3. Click the Erase tab from the top of Photos, turn on the Auto apply button, and adjust the Brush size. Then, you can select the unwanted object from the images.
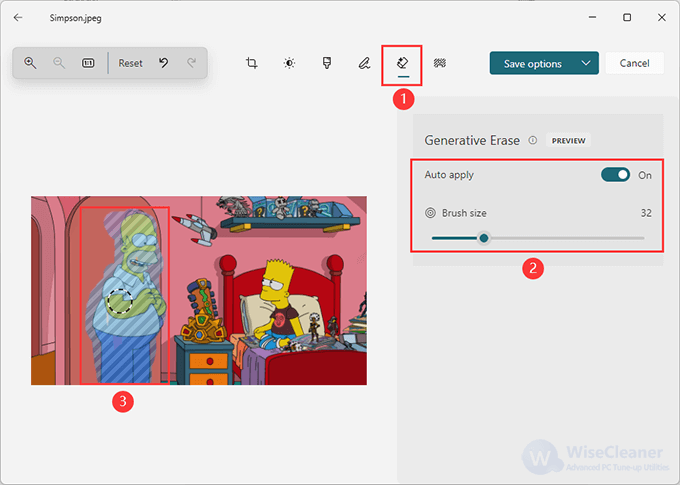
After a moment, the target unwanted object will be removed automatically.

Method 2. Using Paint 3D
Paint 3D can also help you remove unwanted objects from photos.
1. Same steps to open target photo with Paint 3D
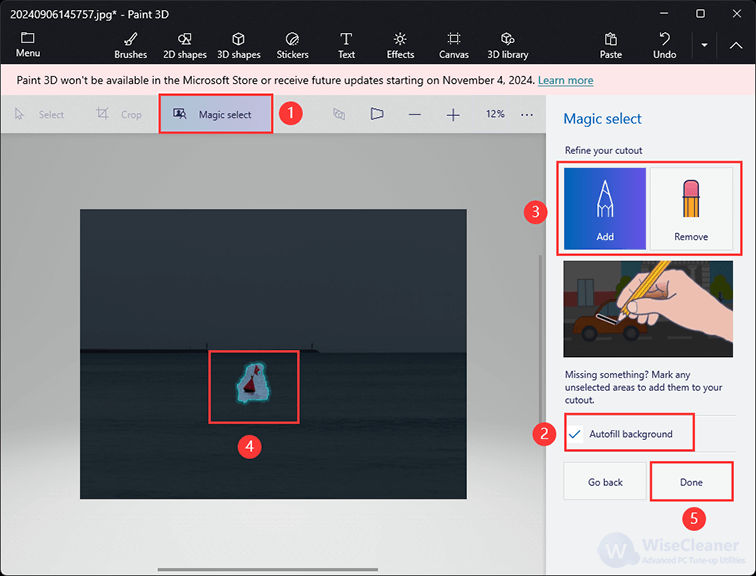
2. Click on the Magic Select tool from the top menu. Adjust the selection box around the object you want to remove and click Next.
3. Use the Add and Remove tools to refine your selection if necessary. Once done, click Done. Paint 3D will remove the object and attempt to fill the area based on the surrounding pixels.
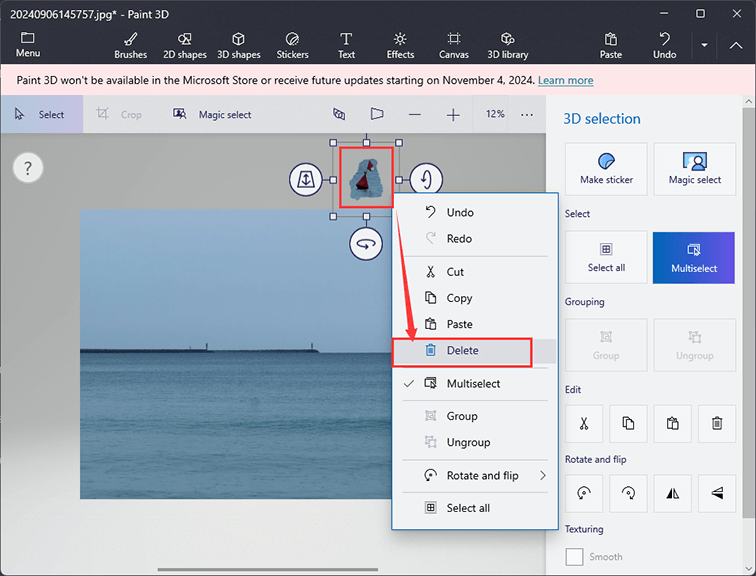
4. Right-click on the unwanted object, then select Delete.
5. Once you're happy with the edit, save your photo by going to Menu > Save As and choosing your desired format and location.
Method 3. Using Wise ImageX
As a comprehensive image editing tool, Wise ImageX offers lots of features to enhance your image’s quality with AI-powered technology. Now, we will mainly talk about its Smart Eraser feature.
Step1. Get Wise ImageX
You can install Wise ImageX from here .
Step 2. Add the image
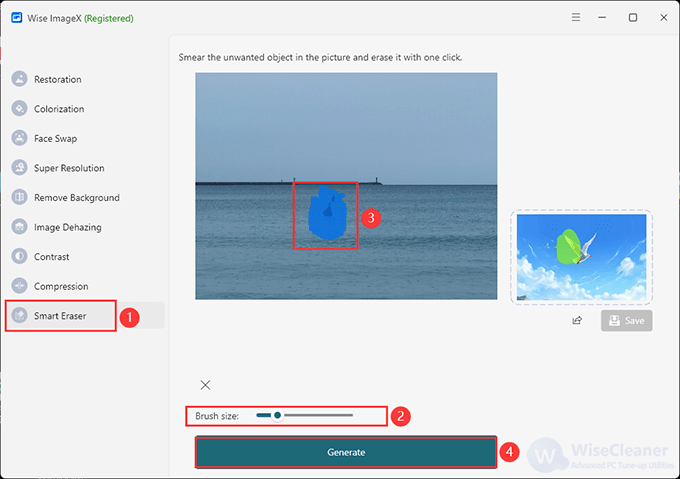
Select Smart Eraser, then click the Add icon to upload the target photo.
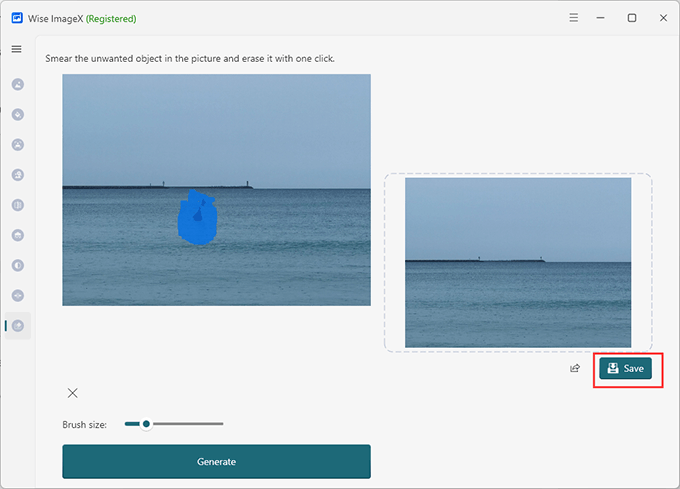
Step 3. Erase unwanted object
You can adjust the brush size first, then select the unwanted part of the image. Click the Generate button to get started.
Step 4. Save image
Seconds later, the result will be displayed on the right side. Click the Save button to finish.
Method 4. Using Adobe Photoshop
If you have Adobe Photoshop on your system, you can also use it to remove unwanted objects from photos.
Step 1. Upload target photo
Click on File > Open and select the photo from which you want to remove an object.
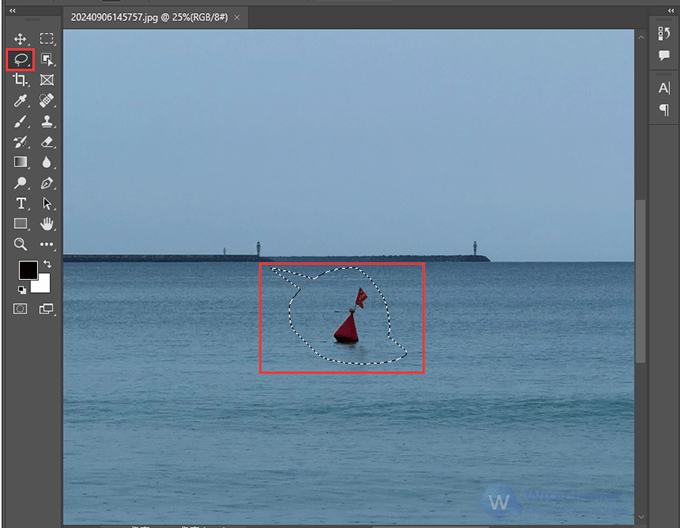
Step 2. Select the Unwanted Object
Use the Lasso Tool or the Quick Selection Tool to draw around the object you want to remove. Ensure that the selection is as close to the object as possible for the best results.
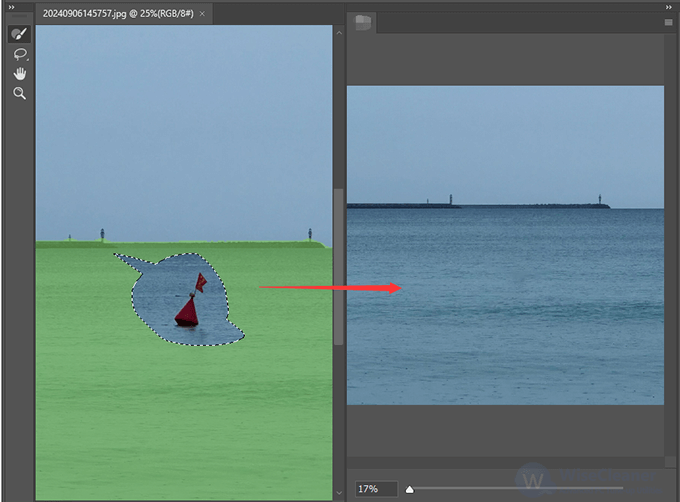
Step 3. Apply Content-Aware Fill
With the object selected, go to Edit > Content-Aware Fill. Photoshop will analyze the surrounding pixels and intelligently fill in the selected area to remove the object.
Step 4. Finalize the Edit
Review the result and make any additional touch-ups if necessary. Once satisfied, save your edited photo by clicking File > Save As.
Conclusion
Now, removing objects from photos seems much easier, thanks to various photo editing tools available on Windows 11. Experiment with these tools and elevate the quality of your photos, ensuring that every image you share is stunning and distraction-free.