Watermarks are typically used to protect the authenticity and intellectual property of a document. They can appear as text or images superimposed on the pages of a PDF file, often indicating the document's status (e.g., "Confidential," "Draft," etc.) or ownership. However, there may be situations where you need to remove these watermarks, such as when you have the necessary rights and permissions to edit the document. In this article, we'll explore several methods to remove watermarks from PDFs.
Method 1. Using Microsoft Word
Microsoft Word is one of the most popular word-processing tools. You can remove watermarks from PDFs with it, which is super easy.
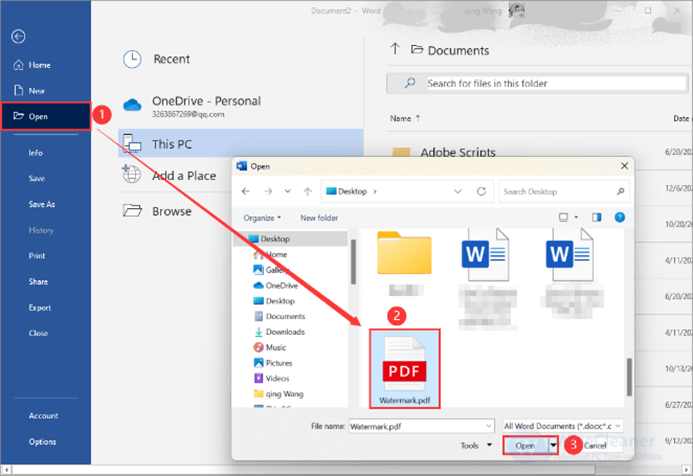
1. Open Microsoft Word, then click the Open tab on the left pane.
2. Select the target PDF file to open, then click OK when the confirmation prompt appears. This will convert the PDF document into a Word doc.
3. You can edit or delete the watermark letter by letter, or select the entire watermark then press the Delete key to remove it at once.
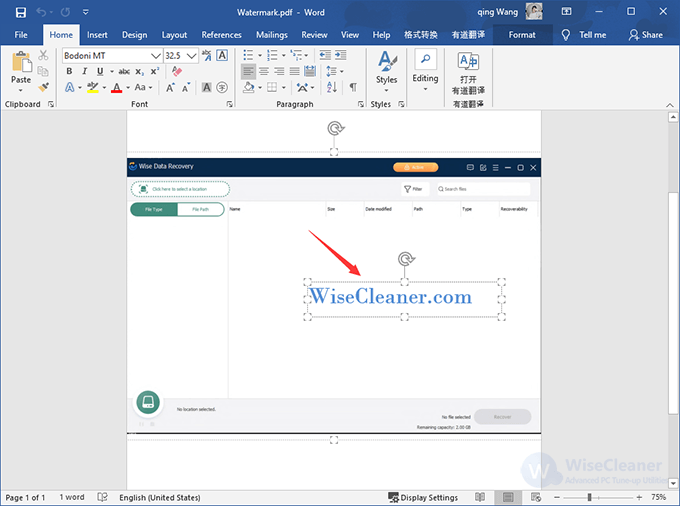
When done, simply press Ctrl + S to save your watermark-free document.
Method 2. Using Google Docs
Google Docs offers a less direct method. Similar to Microsoft Word, it's more useful when the watermark is in the form of editable text.
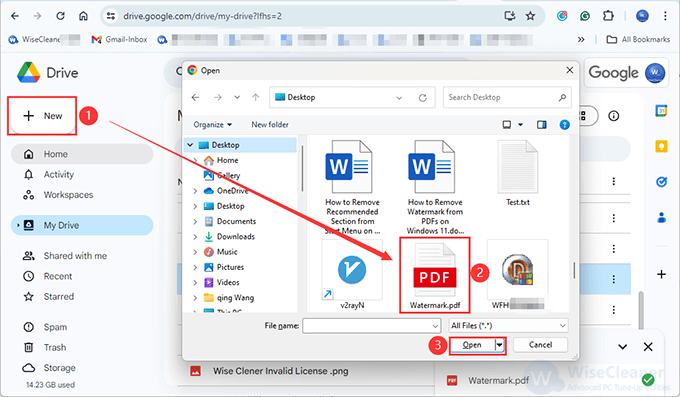
Step 1. Upload the PDF to Google Drive
First, sign in to your Google Drive account and click on the + New button> File Upload, then select the target PDF file to open.
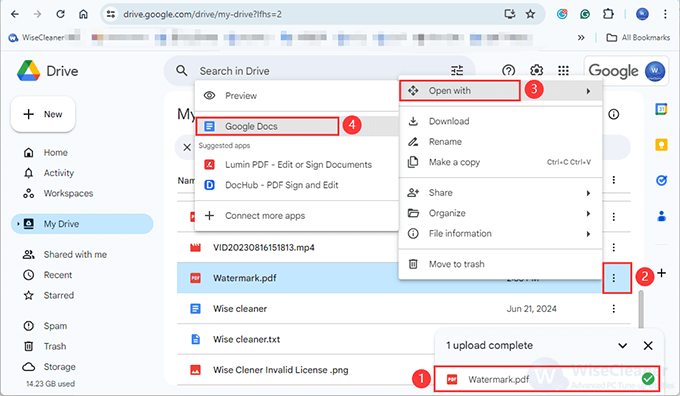
Step 2. Open with Google Docs
You'll see an upload complete notification in the bottom-right corner of your screen. Click on the filename to launch it. If the file doesn't automatically open, click on the Open with drop-down at the top of the page and then select Google Docs.
Step 3. Remove the Watermark
If the watermark is not automatically removed, select it and press Delete on your keyboard.
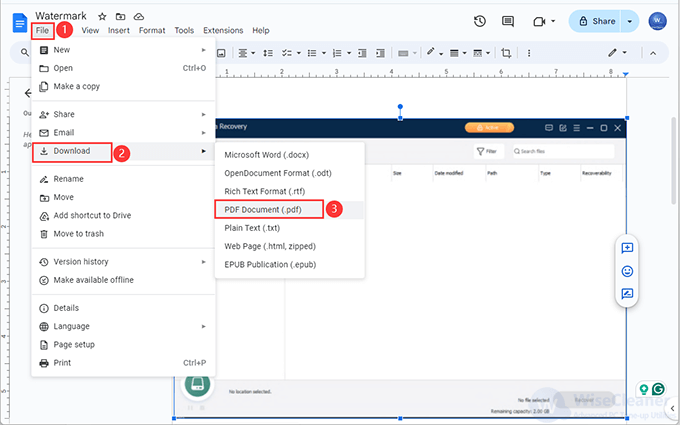
Step 4. Download as PDF
Finally, click on File, select Download, then click on PDF Document(.pdf), and your watermark-free PDF will be saved to your computer.
Method 3. Using Wise PDF Editor
As you can see, these two methods above are not very direct and time-saving since the PDF files need to be converted to another format just to remove the watermark. Fortunately, there is third-party software, Wise PDF Editor, a professional PDF file editing tool that can help you make this easily with several clicks.
Step 1. Download and install Wise PDF Editor
You can get this tool from here .
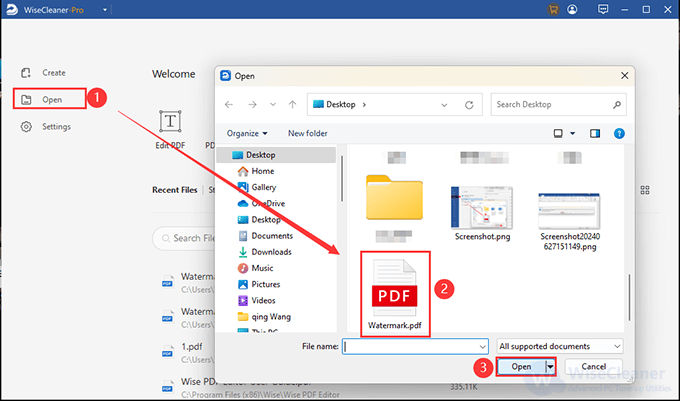
Step 2. Open the target PDF file
Launch Wise PDF Editor directly, and then click the Open tab from the left list on the home page to add the PDF file that you want to remove the watermark from.
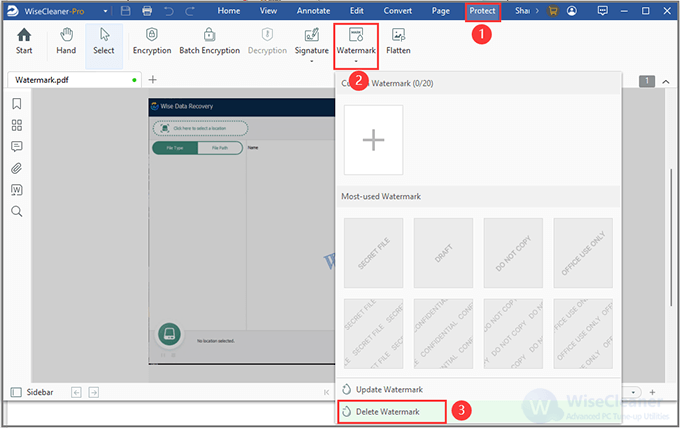
Step 3. Remove the watermark from the PDF file
Click the Protect tab on the top of the Wise PDF Editor, then tap on the Watermark option. You can add or remove a watermark for your PDF file from there. Click on the Delete Watermark option, then the watermark will disappear right away.
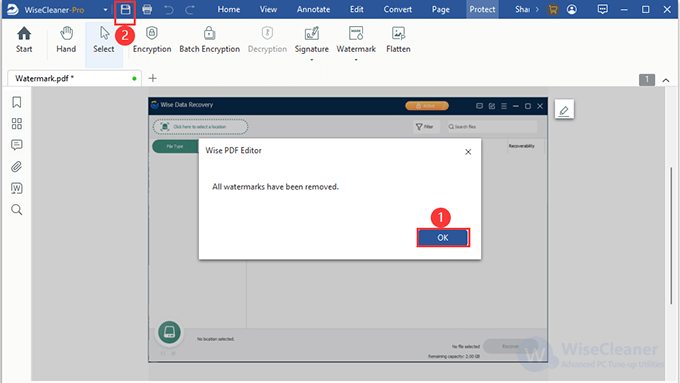
Step 4. Save PDF file
Once the watermark is removed successfully, there will pop up a notification. Click OK, then tap the File icon in the upper left corner to save the PDF file.
Conclusion:
Removing watermarks from PDFs can be straightforward if you have the right tools and proper permissions. Whether using Microsoft Word, Google Docs, or Wise PDF Editor, there is a solution to fit every need. By following the methods outlined above, you can efficiently edit your PDF documents and remove unwanted watermarks.