Although you are not a professional photographer or graphic designer, you may inevitably meet situations removing background from your images in daily life. For example, you may need to remove the busy background of a picture to make a profile photo and an impressive presentation or take it as a necessary step for more complicated work.
Now, there are a lot of software online that can help you remove unnecessary background from images. But in this article, we will focus on three tools to show you how to easily get this skill within several clicks.
Method 1. Use the Windows Photos app
Windows Photos can help you remove the image background easily.
1. Double-click on the photo that you want to remove its background, then it will be opened automatically with Photos.
2. Press Ctrl + E to edit the photo further.
3. Click the Background tab in the top middle, then select the Remove feature in the right pane to remove the photo’s background and preview the effect.

In addition to removing the background, you can also blur or replace it. Finally, extend the Save Options button in the upper-right corner to save the photo.
Method 2. Remove image background via Paint
Paint is a practical image editing tool that can help you remove background from pictures.
1. Click the Start menu, and run Paint there.
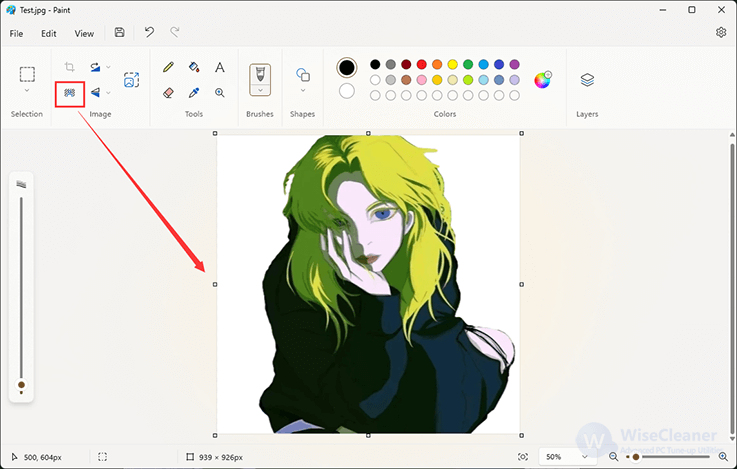
2. Click the File tab in the upper left corner to open the target picture. By the way, you can also directly right-click on the picture to open it with Paint.

3. Select the removing background icon similar to the icon in the Windows Photos. Then you will see the effect at once. Press Ctrl + S to save it.
Method 3. Use Wise ImageX to remove the image background
As a comprehensive image editing tool, Wise ImageX offers lots of features to enhance your image’s quality with AI-powered technology. For instance, you can use it to repair old, blurry pictures, colorize black and white photos, swap faces in photos, and more. Now, we will mainly talk about its Remove Background feature.
Step 1. Get Wise ImageX
First of all, you need to install Wise ImageX. You can get it from here.
Step 2. Remove the image background
Launch Wise ImageX directly after installing, and then you will see seven features listed on the concise page. Select the Remove Background tab, then drag and drop the target image to the Source image box, and click the Generate button to execute the task.

After seconds, you will see the background is removed. Click the Save button in the lower right corner to save the image.
Conclusion:
Removing the background from images on Windows 11 doesn't require professional skills, thanks to these three efficient methods. Whether you opt for the built-in Windows Photos app, the versatile Paint tool, or the advanced Wise ImageX, you can achieve clean and professional-looking results with minimal effort.