It's frustrating when Windows 11 claims there's not enough disk space, even though there appears to be plenty. This issue can arise due to corrupted system files, misreported storage, or hidden data-consuming files. Below are several methods to resolve the issue effectively.
Method 1: Run Disk Cleanup
Windows 11 includes a built-in tool called Disk Cleanup that helps remove temporary files, system cache, and unnecessary data.
Step 1. Open Disk Cleanup
1. Press Win + S, type Disk Cleanup, and open the tool.
2. Select the drive you want to clean (e.g., C:\) and click OK.
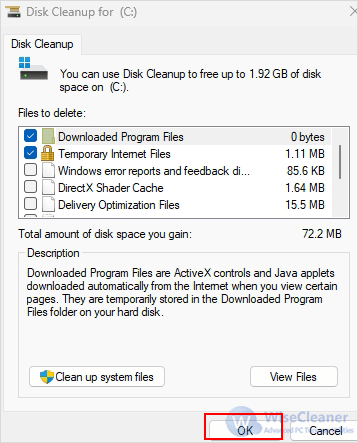
Step 2. Select Files to Delete
Select the files you want to delete in the pop-up window and click OK.
Method 2: Use Wise Disk Cleaner to Free up Disk Space
Wise Disk Cleaner is a disk cleanup and defragment tool that helps remove junk files, temporary files, and unnecessary system data. Sometimes, built-in Windows tools fail to detect certain cluttered files, making a specialized cleaner like Wise Disk Cleaner a great alternative.
Step 1. Download and Install Wise Disk Cleaner
Download Wise Disk Cleaner and install it on your PC. Launch the application after installation.
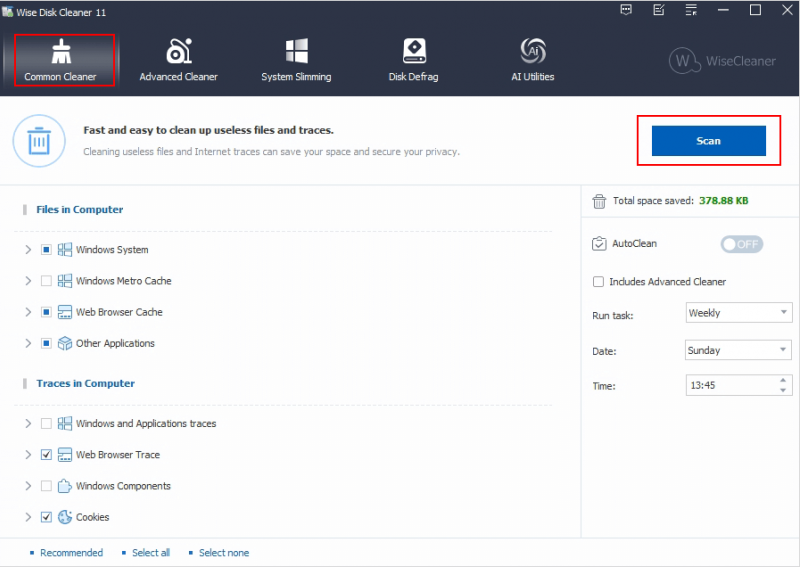
Step 2. Perform a Common Cleanup
1. Select the Common Cleaner tab in the top toolbar, check the category you want to clean (e.g. Windows System, Web Browser Cache, Cookies) and click Scan to analyze the junk files on your system.
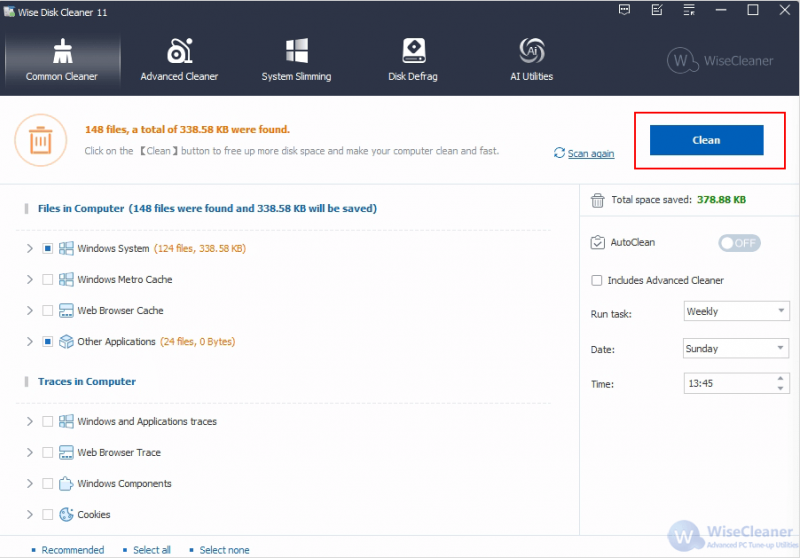
2. Once the scan is complete, click Clean to remove unnecessary files.
Step 3. Use Advanced Cleaner and Slimming System
1. Navigate to the Advanced Cleaner tab, select the disk you want to clean and click Scan.
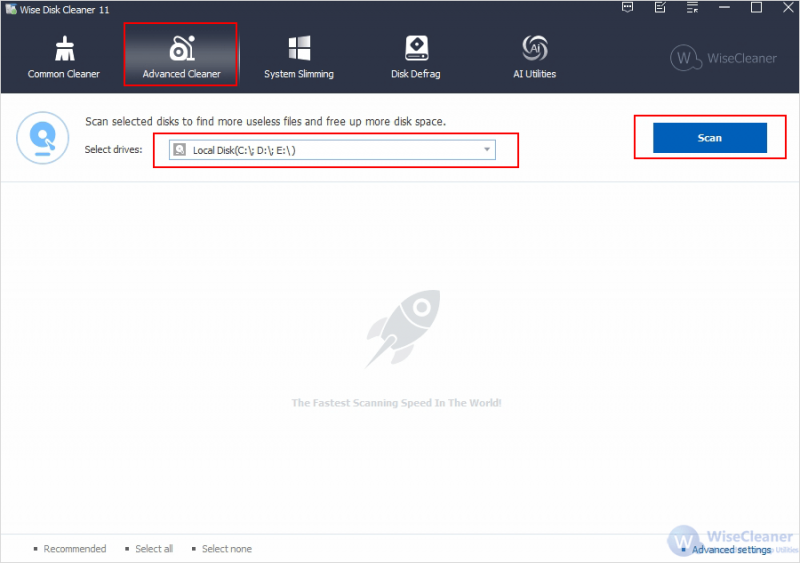
2. Click Clean to remove deep-level system junk files.
3. Go to the Slimming System tab to remove unnecessary system components.

Method 3: Check Disk for Errors
File system errors can cause misreporting of available storage, leading Windows to think there isn’t enough space when, in fact, the storage is being mismanaged due to corruption or bad sectors.
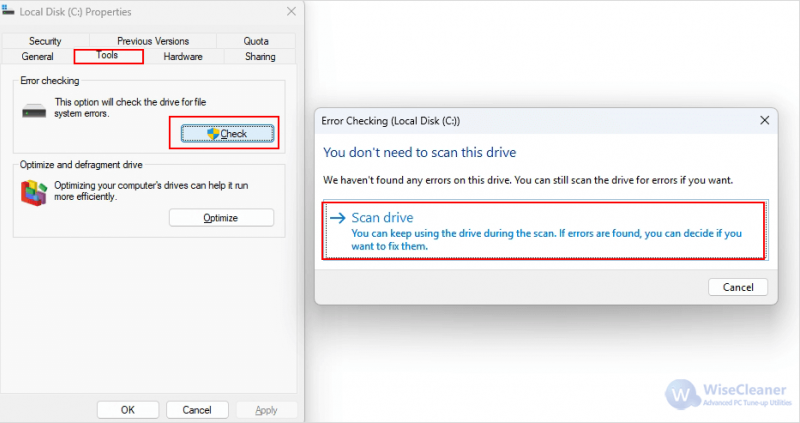
Step 1. Open Drive Properties
Open File Explorer and right-click the affected drive (e.g., C:) > Properties.
Step 2. Check Disk Errors
Select Tools. Under Error checking, click Check > Scan drive. If errors are found, follow the on-screen instructions to repair them.
Method 4: Reduce Virtual Memory
Virtual files can consume large amounts of storage while being hidden from normal view.
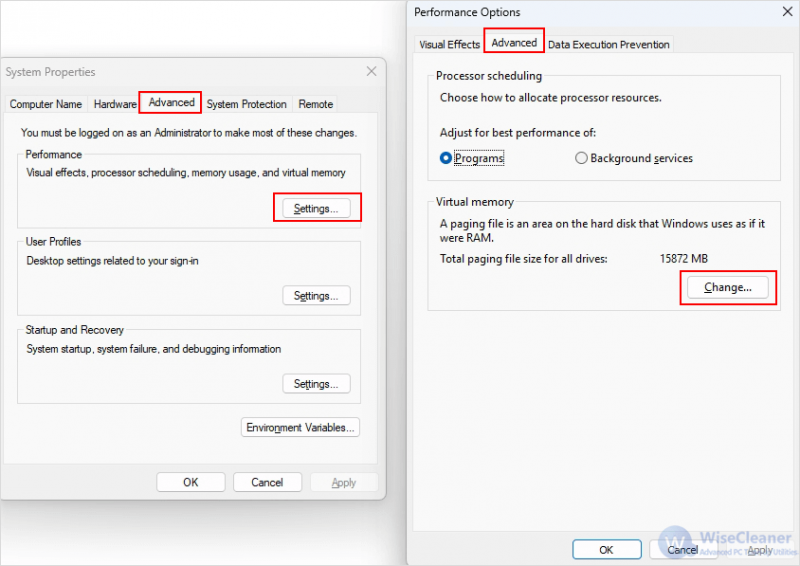
Step 1. Open Advanced system settings
Type advanced system settings in the search bar and open it.
Step 2. Adjust Pagefile Size
1. Select Advanced and under Performance click Settings > Advanced > Change.
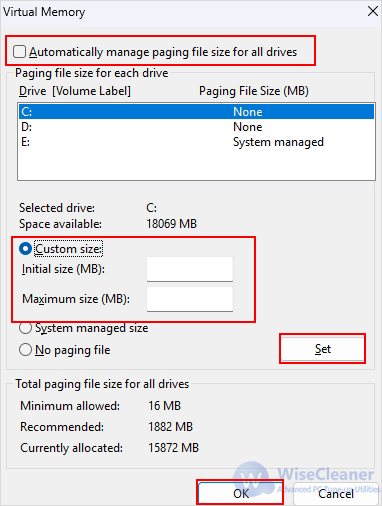
2. Uncheck Automatically manage paging file size.
3. Select Custom size and set a smaller value, click Set and OK.
Method 5: Disable Disk Quotas Management
Disk quotas are a feature in Windows that limit the amount of space each user can use. If quotas are enabled and set too low, Windows may incorrectly report insufficient storage.
Step 1. Open Drive Properties
Open File Explorer and right-click the affected drive > Properties.
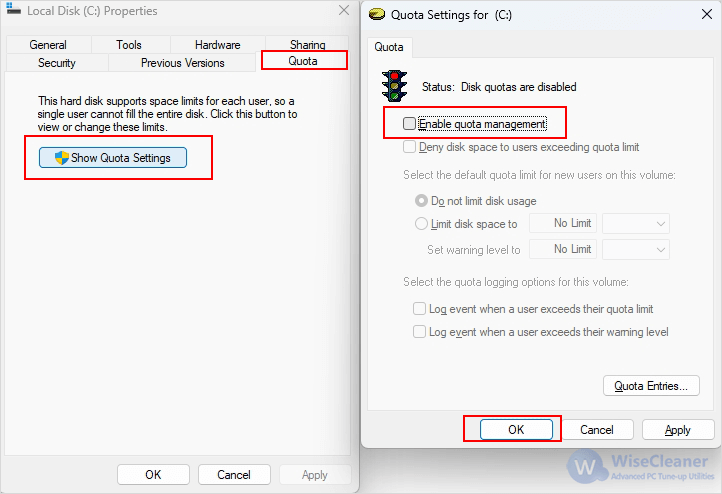
Step 2: Adjust Quota Settings
1. Go to the Quota tab > Show Quota Settings.
2. Uncheck Enable quota management.
3. Click Apply > OK.
Conclusion
By following these methods, you can reclaim your disk space and restore normal system functionality. If the issue persists, consider consulting Microsoft Support, updating Windows, or resetting your system settings for a fresh start.