Microsoft OneDrive is a cloud storage service integrated into Windows 11, allowing users to store and sync their files across devices seamlessly. However, if you prefer using other cloud services or simply don’t want OneDrive on your system, you can uninstall it completely. This guide will walk you through the steps to completely uninstall OneDrive from Windows 11.
Steps to Completely Uninstall OneDrive via Settings
Here’s a step-by-step process to ensure OneDrive is completely removed from your system with Settings.
Step 1. Unlink OneDrive
Before uninstalling, it's advisable to unlink your OneDrive account to ensure no files are accidentally lost or left unresolved.
- Click on the OneDrive cloud icon in the system tray to open it.
- Then select Settings from the menu.
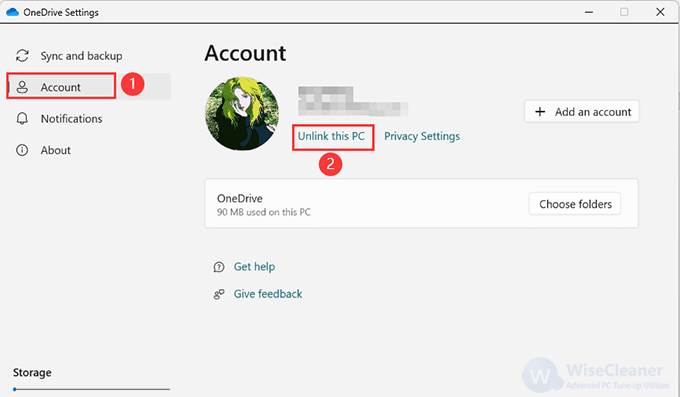
- Go to the Account tab and click Unlink this PC. This will prevent OneDrive from syncing to your PC.
Step 2. Uninstall OneDrive
Once unlinking is complete, you can proceed to uninstall OneDrive through the following steps.
- Press Win + I to open the settings.
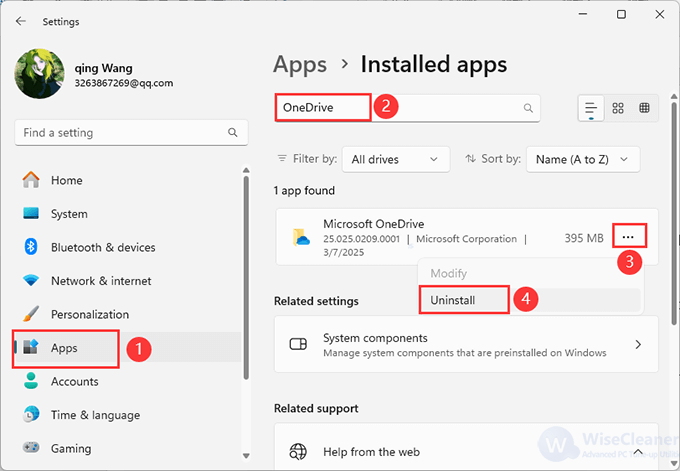
- Click the Apps on the left pane. Then click on the Installed apps option in the Apps section.
- Scroll down and locate the Microsoft OneDrive app in the list.
- Click on the three dots and select the Uninstall option. (There will be a prompt box reminding you that the program and related information will be uninstalled. Click Uninstall to complete the operation.)
Step 3. Remove OneDrive Folders
Uninstalling OneDrive may leave behind some residual files and folders. You can clear them by following this:
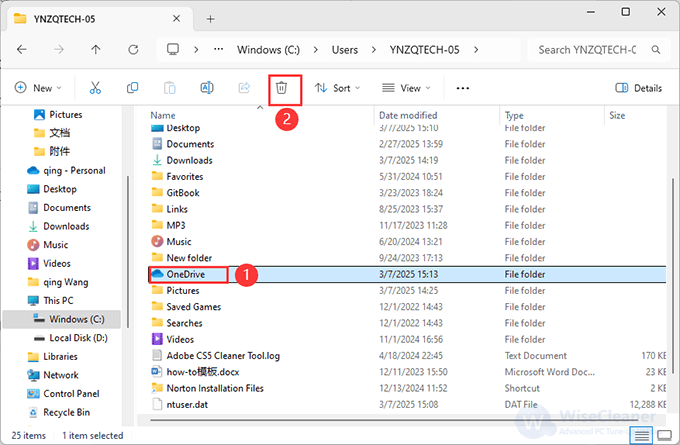
- Open File Explorer and navigate to your user folder (usually C:\Users\[YourUsername]).
- Find the OneDrive folder and delete it. Make sure you’ve moved or backed up any files you need from this folder, as deleting it will remove these files from your local PC (but not from OneDrive cloud storage if you’ve already unlinked your PC).
Step 4. Clean Up Registry Entries (Optional)
For those comfortable with registry edits, you can remove lingering registry entries.
- Press Win + R, type
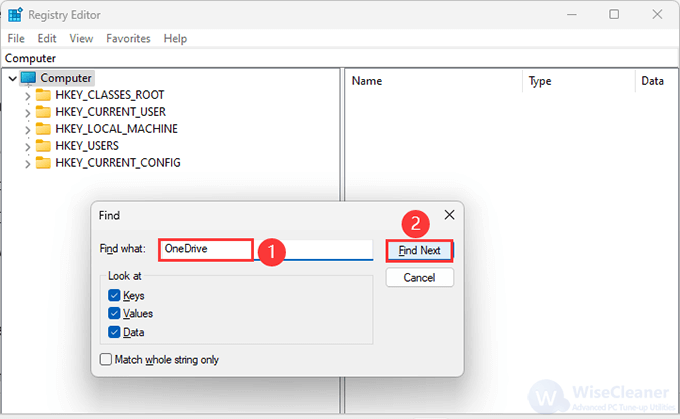
regedit, and press Enter. - You can manually search or use Find (Ctrl + F) for OneDrive to navigate OneDrive.
- Carefully delete any entries associated with OneDrive, ensuring not to interfere with other system-critical components. Exercise caution when editing the registry.
Using Wise Program Uninstaller to Remove OneDrive Permanently
Once unlinking is complete, you can proceed to uninstall OneDrive through the following steps.
If you prefer to use a simple and efficient way to remove OneDrive completely, Wise Program Uninstaller would be a reliable choice. It’s free but highly efficient to remove programs. Beyond Microsoft OneDrive, Wise Program Uninstaller can also smoothly uninstall third-party apps, other Windows built-in apps, and UWP installed from the Windows Store from your computer.
Step 1. Install Wise Program Uninstaller
If you have not owned this practical tool, click here to get it now.
Step 2. Find Microsoft OneDrive
After installation, you do not need to register or anything. Just click on the All Programs tab and input Microsoft OneDrive in the search box. The result will come out for a split second.
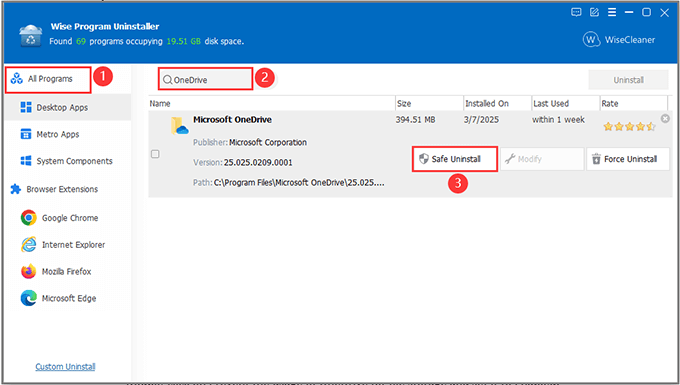
Step 3. Uninstall OneDrive
Checking OneDrive, you can uninstall it directly by clicking the Uninstall button. Besides, click on the Microsoft OneDrive item, and you will see three options there: Safe Uninstall, Modify, and Force Uninstall. When using Safe Uninstall, Wise Program Uninstaller will call the program's anti-installation program to perform the removal operation and then scan and clean up the residual items. But in case the safe uninstall does not work, you can use Force Uninstall to make it.
Prevent OneDrive from Reinstalling via Group Policy (Optional)
To stop OneDrive from installing for new users in Windows 11, do the following.
- Press Win + R, type
gpedit.msc, and press Enter. - Navigate to
Computer Configuration > Administrative Templates > Windows Components > OneDrive. - Double-click on Prevent the usage of OneDrive for file storage and set it to Enabled.
- After completing the above steps, restart your computer to ensure all changes take effect.

By following these steps, you can completely remove OneDrive from your Windows 11 PC.
Conclusion
Uninstalling OneDrive from Windows 11 is a relatively straightforward process, but it requires careful attention to ensure that no residual files remain on your system. Whether you are switching to another cloud service or prefer local storage, these steps will help you achieve a complete uninstallation of OneDrive. Remember to always back up essential files and consider system restore points before making significant changes to your system.

