As Windows 11 continues to enhance user experience with its modern design and powerful features, file management remains a crucial task for maintaining optimal system performance.
Duplicate text files can be accumulated variously, such as multiple downloads, copying files to different locations, or using multiple applications generating similar files, consuming disk space and complicating file organization.
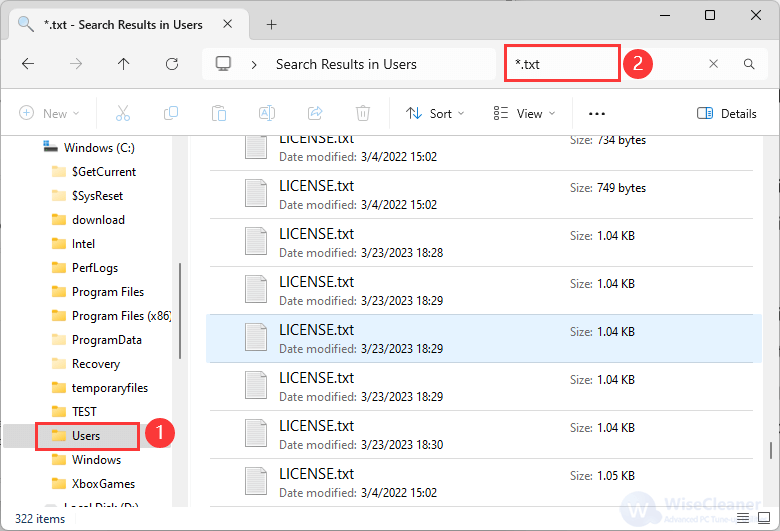
As we all know, File Explorer in Windows provides basic tools to manually search for and identify duplicate files: You can go to the folder where you suspect duplicates might exist, type *.txt to filter text files and click on Name or Size column headers to sort files. This can help you spot duplicates to delete as they'll be next to each other if sorted correctly. However, this process is not efficient and thorough enough since you can only go to one location to search those prospective duplicates each time.
Fortunately, Wise Duplicate Finder is a reliable tool that simplifies the process of identifying and removing these duplicate files. This article will guide you through using Wise Duplicate Finder to clean up duplicate text files on your Windows 11 system.
Wise Duplicate Finder is a user-friendly tool designed to help users find and remove duplicate files of various types, including graphic files, temporary files, video files, text files, and more.
Steps to Find and Delete Duplicate Text Files with Wise Duplicate Finder
Step 1. Get Wise Duplicate Finder
You can download and install Wise Duplicate Finder from here.
Step 2. Select the location to scan
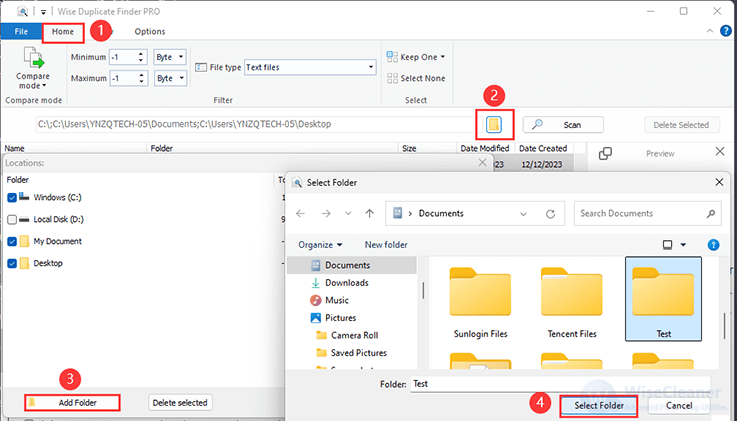
Launch Wise Duplicate Finder directly after installation. Click the file icon under the Home tab, tap the Add folder button to choose the directory where you want to search for duplicate text files, and then click the Select Folder button to add. You will find that Wise Duplicate Finder allows users to check a single folder or multiple directories.
Step 3. Adjust settings.
It’s important to make some necessary changes before scanning and deletion.
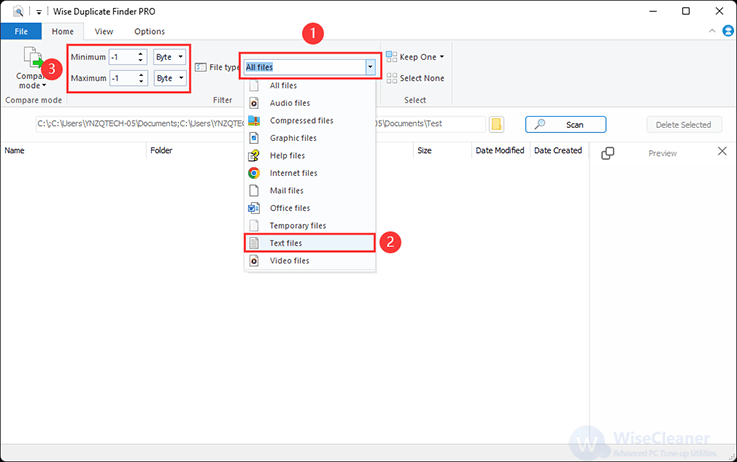
- In the File Type area, select Text Files so the program focuses on the types of files you want to investigate. You can also decide the size span by adjusting the value of Minimum and Maximum.
- Click the Options tab, and check the Delete files to Recycle Bin or Back up files before permanently deleting. It’s wise to back up important files regularly before running large deletions to avoid data loss.
Step 4. Start the scan process
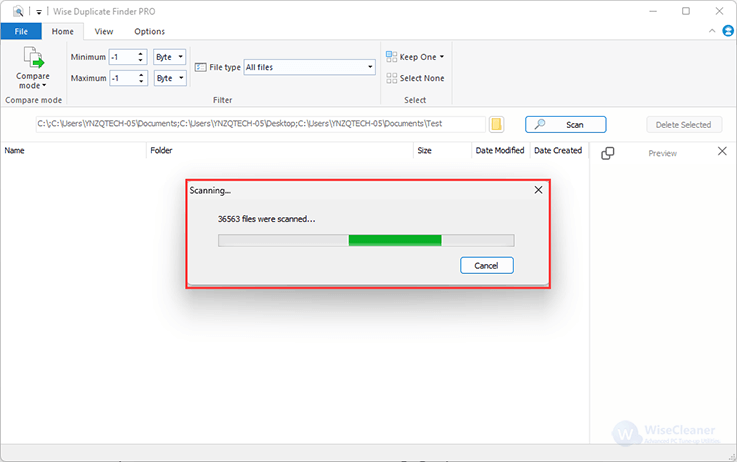
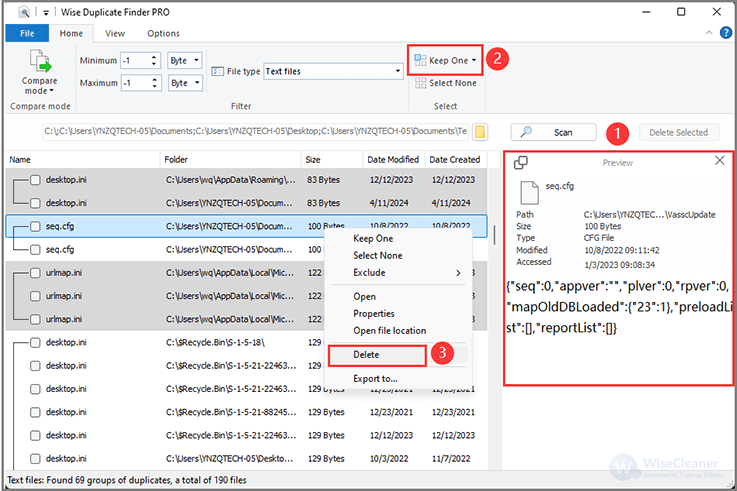
Once your selections are made, click Scan to get started. Once the scan is complete, you'll see a list of duplicate text files.
Step 5. Review and delete duplicates
There is a Preview part on the right side, which allows you to preview these scanned files. You can manually select files to delete, or select all duplicates with one click by using the Keep One feature. Ensure you review the list carefully to avoid accidental deletion of needed files before removing them.
Conclusion
Wise Duplicate Finder is an effective solution for managing duplicate text files in Windows 11. By following this guide, you can easily streamline your file management process, reclaim valuable disk space, and maintain an organized file system. Regular use of this tool will help keep your Windows 11 environment running efficiently and clutter-free.