Advanced display settings refer to the additional options and settings about the display on your computer, such as refresh rate, resolution and color depth. These settings go beyond the basic resolution and orientation adjustments and provide more control over the appearance and functionality of your display.

However, some users have recently reported that their advanced display settings are not displayed in Windows Settings App on their Windows 11. In this post, we’ll walk you through the steps you can take to view the advanced display settings with ease in another way.
How to view Advanced display settings via Wise Care 365
Step 1. Download & install
Don’t try to download Wise Care 365 from any sources that you don’t know well or look weird. Click here to access the official website of Wise Care 365.
Noted: if your firewall or security management software tells you that the source is unreliable during installation, just ignore it and keep finishing the installation process.

Step 2. Switch to System Monitor
When you’re done installing, launch Wise Care 365.
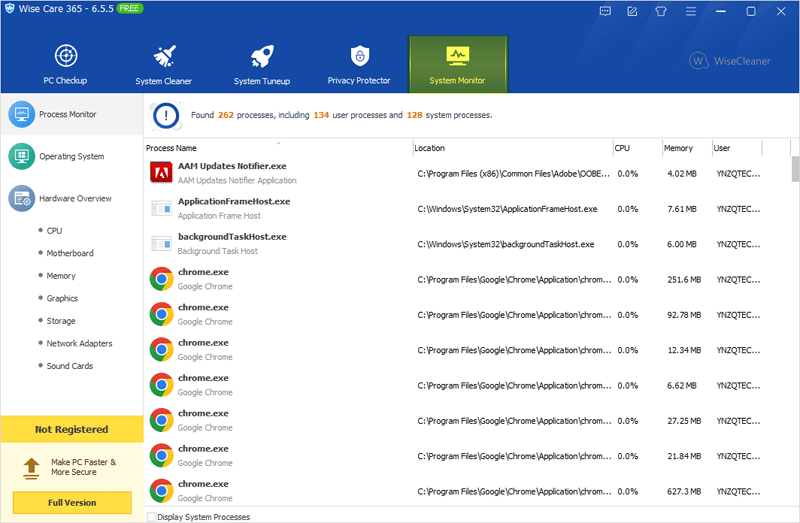
You will see five tabs on the top. Select the tab of System Monitor.

Step 3. Select Graphics
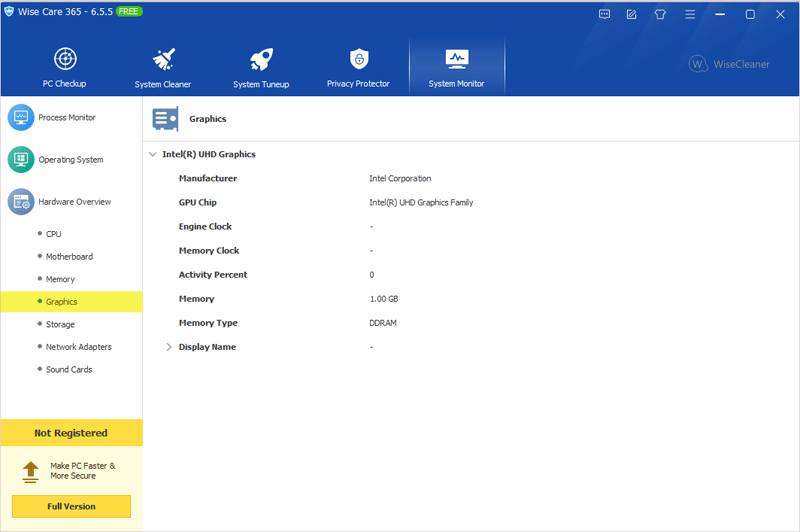
On the left panel, there are Program Monitor, Operating System and Hardware Overview. Select Graphics under Hardware Overview.

Step 4. Open Display Name
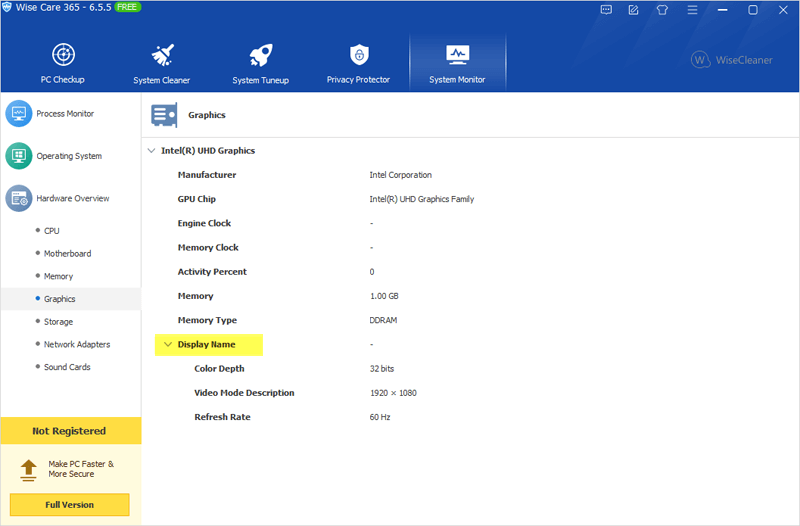
The detailed information of Graphics will be listed on the right. Click and open the drop-down menu of Display Name, then you can view advanced display settings of your Windows 11 just like in Windows Settings.

With advanced display settings in Wise Care 365, users can significantly enhance their experience and customize the display to meet specific preferences and needs. Professional WiseCleaner will always offer you better solutions to optimize your Windows PCs and make them at best performance.