A common problem in Windows is accidentally deleting files and folders. In this case, you can recover your lost data in various ways. However, data recovery can often be quite complicated, especially for permanently deleted files. As you use your PC, new data overwrites deleted files. This makes your chances of recovering permanently deleted files very limited. Thus, it’s best to be safe by protecting your files from being deleted.
In this guide, we show you several methods to make it.
Method 1. Use File Permissions
One of the best ways to secure your files is by configuring the permissions settings, allowing you to control who can view or modify your files.
1. Right-click the file or folder you want to protect and select Properties.
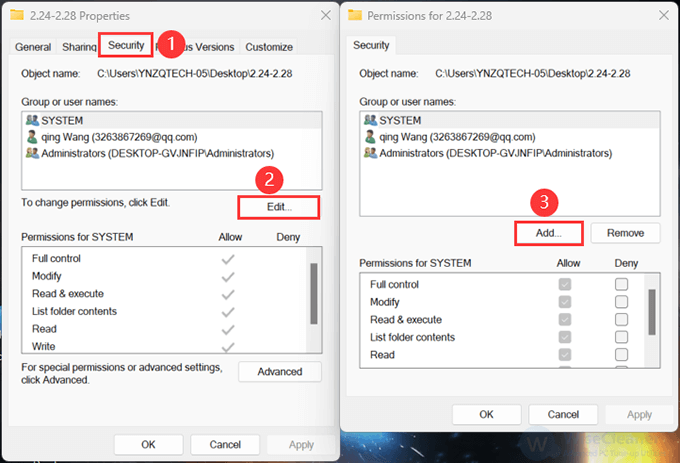
2. Go to the Security tab and press Edit to change permissions. The Permissions window will pop up. Select the Add button on this window.
3. In the Select Users or Groups window, type Everyone in the Enter the object names to select box. Press OK to continue.
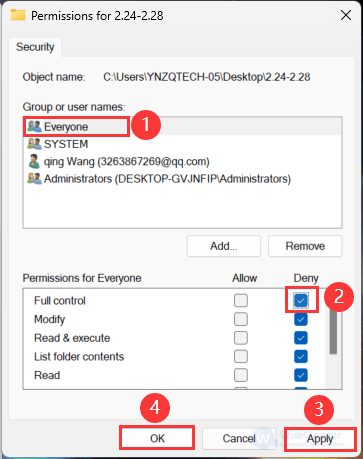
4. Select the Everyone user name in the Permission window. From here, go to the Permissions for Everyone section. Check the Deny box next to the Full control option. Hit Apply > OK.
Method 2. Use Wise Folder Hider
A third-party tool is the best solution if you'd like to simplify the process. You can choose Wise Folder Hider, which provides additional protection against deletion and unauthorized access.
Step 1. Get Wise Folder Hider
You can download and install Wise Folder Hider from here. Open it directly after installation.
Step 2. Add the target file to lock
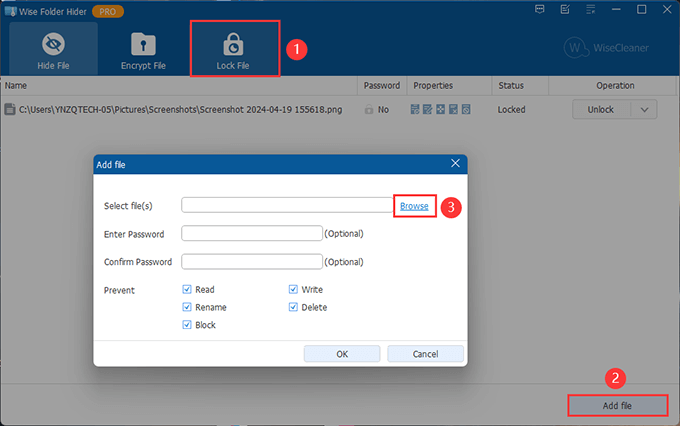
Select the Lock File feature in Wise Folder Hider, click the Add file> Browse, then add the file that you want to protect.
Step 3. Set properties
You can set a password in the Add file window (optional). Then, check Delete in the Prevent bar, or both if you need something else. Click OK to finish.

Step 4. Check effect
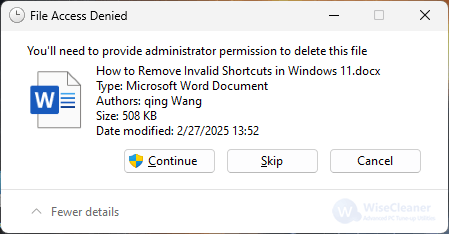
After locking this file, it is still visible at its original location. When you try deleting, you will get this pop-up window.
By the way, you may notice that Wise Folder Hider can not only lock your files but also offers Hide File and Encrypt File features, which can help protect your data further.
Method 3. Secure Your Files Via the Command Prompt
To enhance the security of your files, you can also use the Command Prompt to provide strong protection. This approach offers greater security but a little bit more complicated operation compared to other methods, as it not only prevents others from deleting your files but also restricts them from viewing them.
1. Press Windows + S to open the Search bar and type CMD. Click Run as administrator to go on.
2. To lock a file or folder, type the following command in the Command Prompt:
cacls File_or_Folder_Path /P everyone:n
You need to replace the File_or_Folder_Path command with a relevant file or folder path. You can get your file or folder path by following this: Go to the file or folder, right-click on it, and then click Properties> General. Copy the file path from the Location area.
Here’s an example of what the command will look like:
cacls C:\Users\YNZQTECH-05\Desktop /P everyone:n
3. When you've typed the correct command in the Command Prompt, press Enter to execute. If you get the command, Are you sure (Y/N)?, type Y and hit Enter. Your file or folder should now be locked.
Conclusion:
By applying these methods, you can protect important files on Windows 11 from accidental or unauthorized deletion.

