Caches are usually temporary files that are downloaded by the operating system and applications in your computer to speed up the experience. Over time, if caches are not cleared in time, they will take up a lot of space and affect computer performance.
If your computer is showing low memory space, try clearing your cache, maybe it can free up a lot of memory space. If you are interested in this article, please continue reading.
Method1. Remove temporary files
Step1. Open the Settings
Press Win + I to open the settings. Or you can click on Windows Start and type settings in the search box. Find and open the matched item.
Step2. Remove temporary files
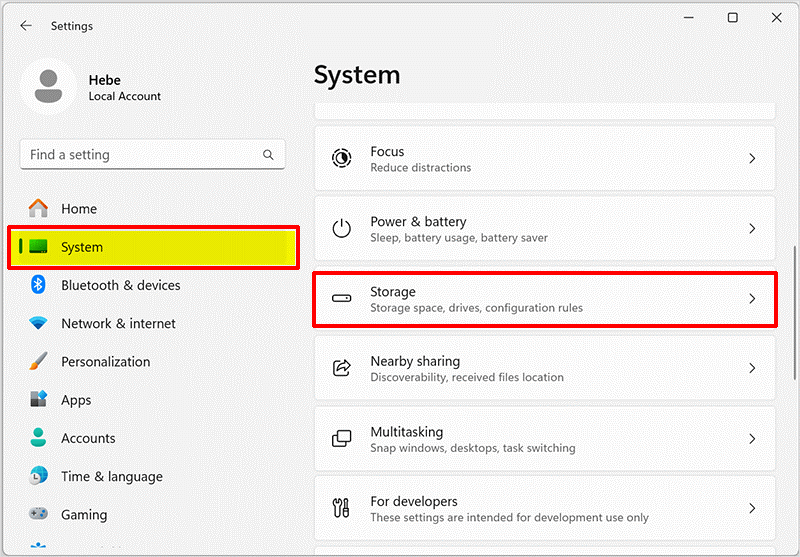
Once open the Settings, click on System in the left pane, and select Storage in the right column.
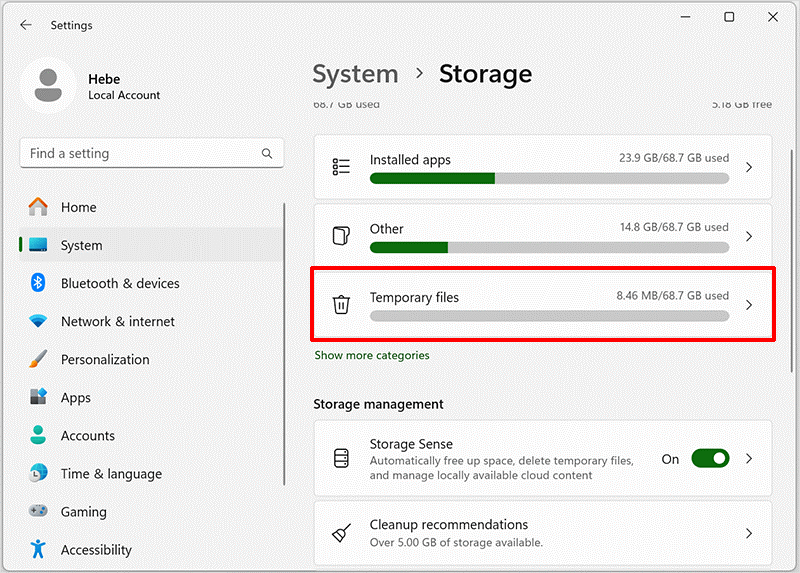
Next, click on Temporary in the list.
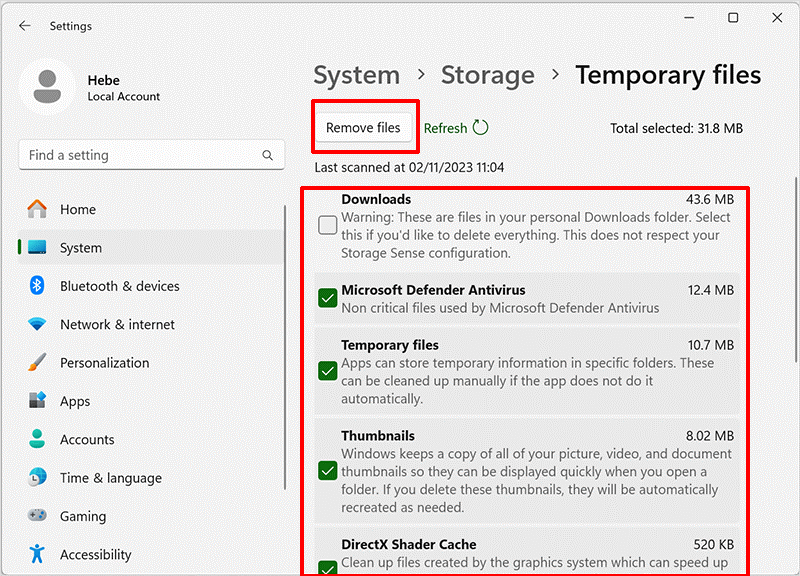
Finally, select the useless items you want to delete, check the box in front of them, and click the Remove files button.
Method2. Clear Windows Update cache
Step1. Open the File Explorer
Press Win + E to open the File Explorer. Or click on Windows Start and type File Explorer in the search box. Find and open the matched item.
Step2. Clear Windows Update cache
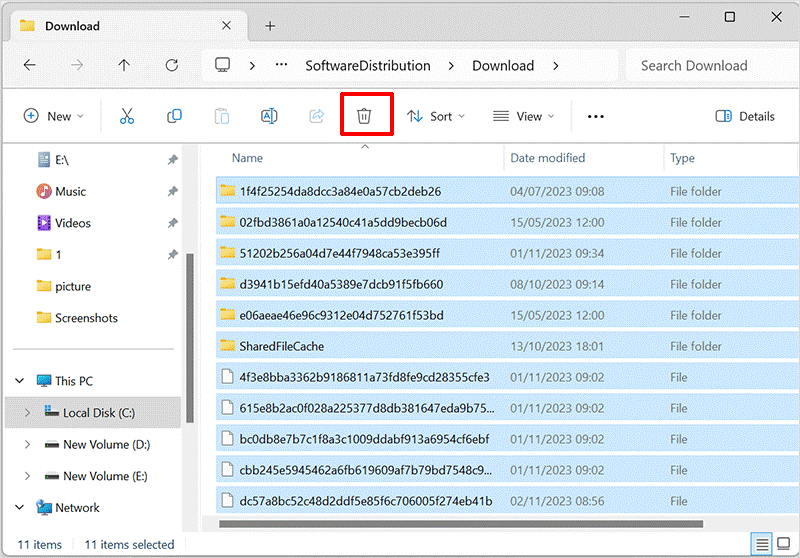
Once you open the File Explorer, type the following path in the address bar and press Enter.
C:\Windows\SoftwareDistribution\Download
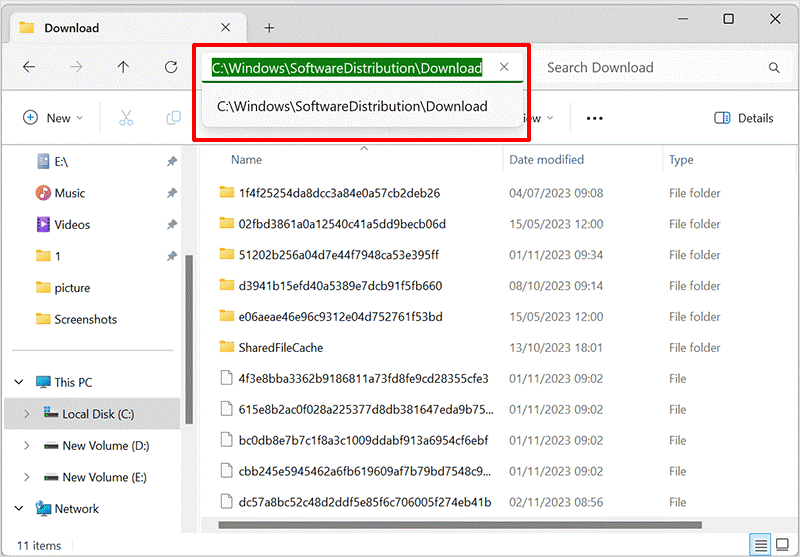
Click on See more and hit Select all. Finally, select Delete to remove all folders and files.
Method3. Remove search history
Step1. Open the Privacy & security in the Settings
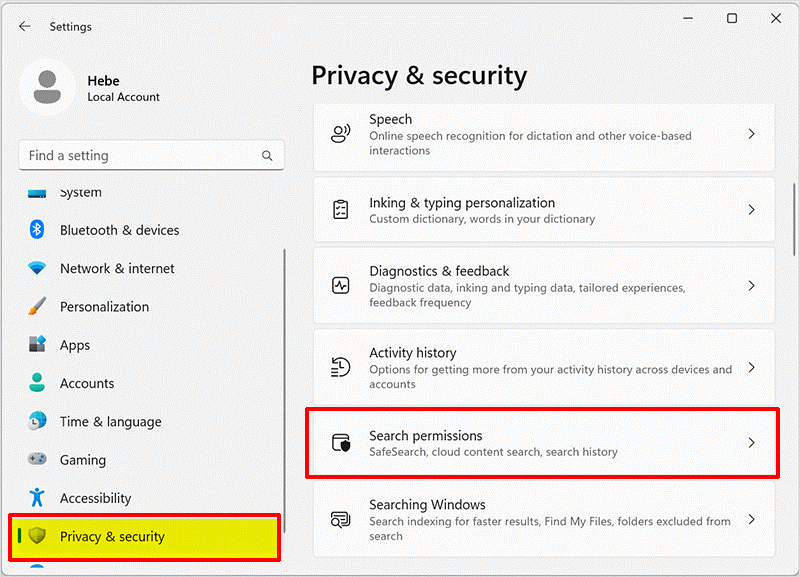
Press Win + I to open the settings. Select Privacy & security in the left pane, and hit Search permissions in the right column.
Step2. Clear device search history cache
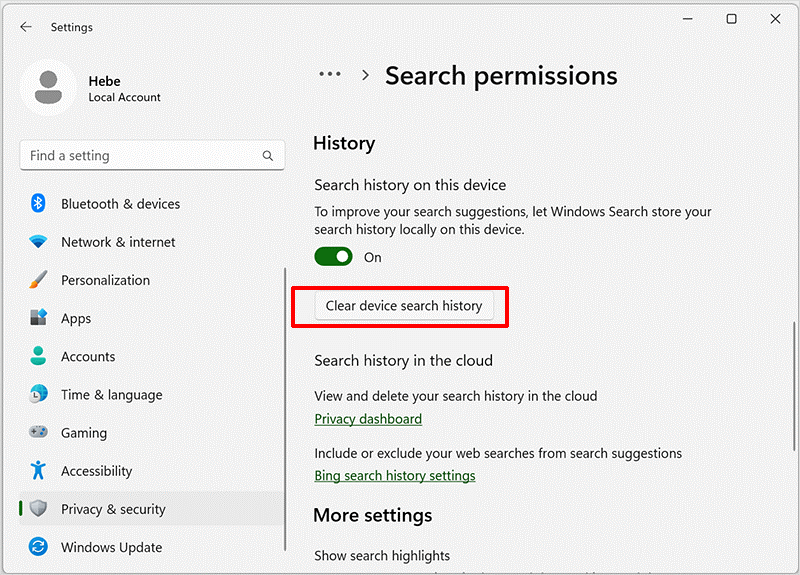
Scroll your mouse down to locate and click the Clear device search history button. After completing this step, your computer search history will be completely deleted.
Method4. Clear cache on Windows using Wise Care 365
Wise Care 365 is a comprehensive and efficient PC optimization tool that can help you solve problems such as your PC running too slowly, excessive junk file accumulation, and privacy leakage.
It can also be called Disk Cleaner, which can clean up useless files in the system disk, such as log files, thumbnail cache files, Windows update files, browser cache files, browser history, cookies, browser saved passwords, temporary files created by various third-party applications (Adobe, Office, etc.), etc.
You can follow the steps below to clear the cache on your computer in one click.
Step1. Download and install Wise Care 365
First, you need to download Wise Care 365. If you haven't downloaded it yet, you can click here to download it safely.
Step2. Clear cache on Windows using Wise Care 365
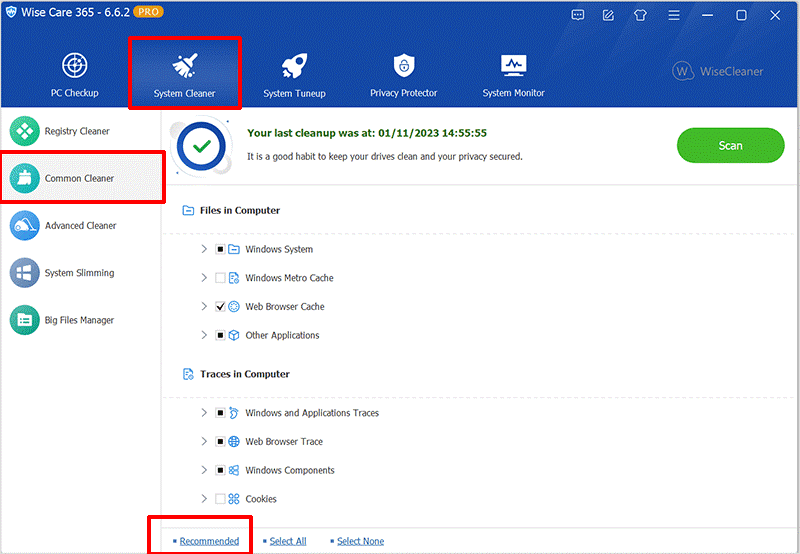
Run Wise Care 365, find and click System Cleaner on the navigation bar. Then select Common Cleaner in the left column. Select the items to be scanned in the right pane.
Notice: You can click on any of the drop-down buttons to pick the items that need to be scanned. If you are not sure if the items can be scanned and removed, you can click the Recommended button at the bottom of the window and the software will automatically check the items that can be cleaned.
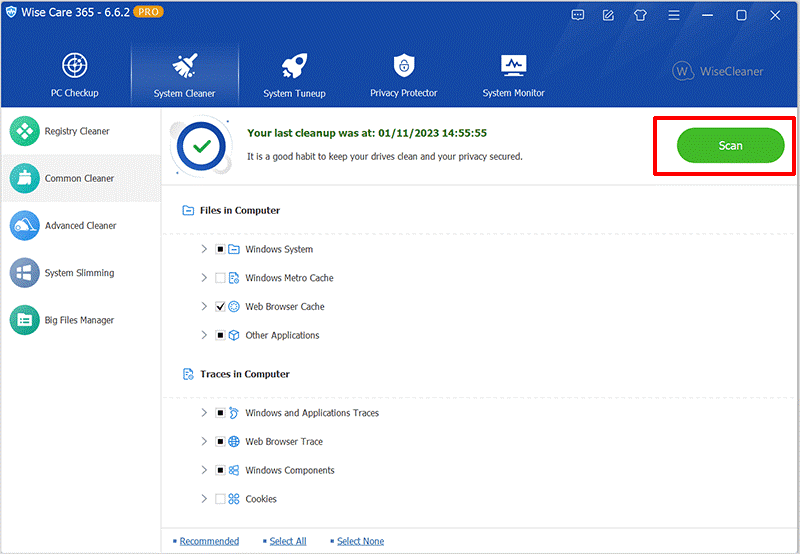
After checking all the items, click the Scan button in the upper right corner of the window.
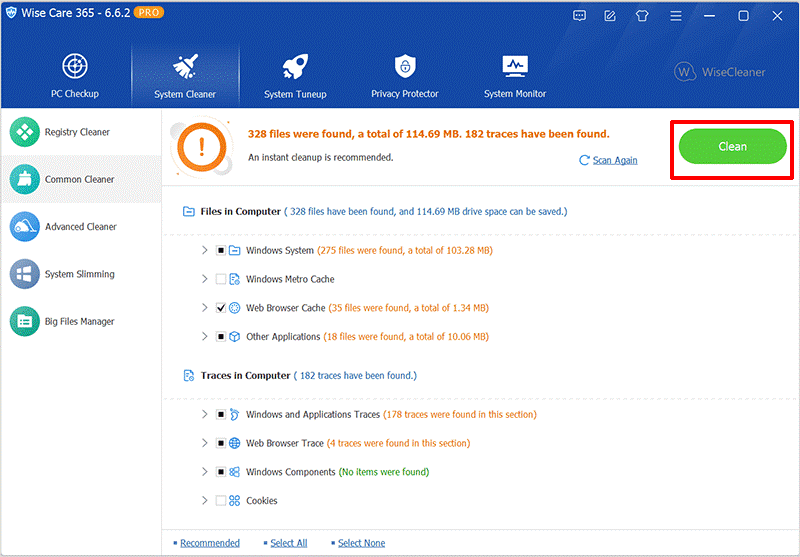
After waiting for a while, the scan is completed, and then click the Clean button to remove the cache.
Summary
In short, clearing the cache is very important for daily maintenance of the computer and improving performance. By cleaning your cache regularly, you can free up storage space, improve your device's speed and performance, and protect your privacy. If you find it troublesome to search for cache everywhere, it is recommended to use Wise Care 365 for one-click cleanup, which is convenient and fast.