WiseCleaner Think Tank
Encounter difficult computer problems?
All about maintenance and optimization of your Windows System.
Jan 16, 2014
By default, Windows Explorer hides certain parts of a filename from you. For example, a file named "sample.txt" will appear in Explorer as a "sample". Likewise, a file named "virus.jpg.exe" will appear to you as "virus.jpg".
This behavior is hazardous, and can potentially cause you to double-click on a file like "virus.jpg", thinking that it is just a picture when it is actually a program "virus.jpg.exe" which you would never have clicked had you really known the filename.
This behavior also causes a lot of problems, particularly for webmasters trying to fix other problems created by Notepad, and so on.
Fortunately, it's easy to fix this problem in Explorer. I'll give the procedure separately for Windows XP, Windows Vista and 7, Windows 8, Windows 10, and Windows 11.

1. Open Windows Explorer.
You can do this by clicking "My Computer" from the Start Menu. Note that this is NOT the same thing as Internet Explorer.
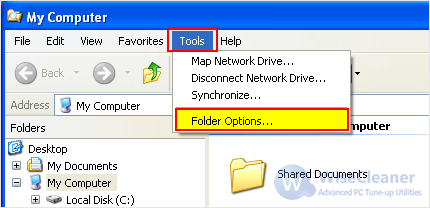
2. Click the "Tools" menu on the menu bar in Explorer (the menu bar is at the top of the Explorer window, underneath the window title). Click the "Folder Options" item in the popup menu that appears.
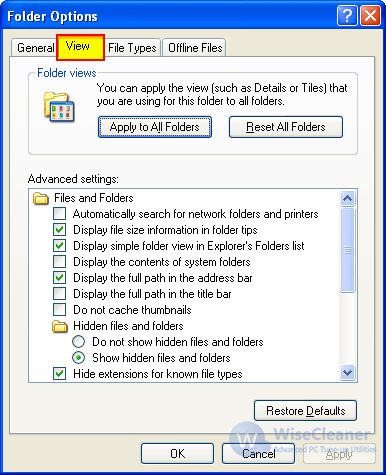
3. A dialog box appears. Click the "View" tab at the top of the window.
4. Look for the setting "Hide file extensions for known file types" and uncheck the box beside it to disable it.
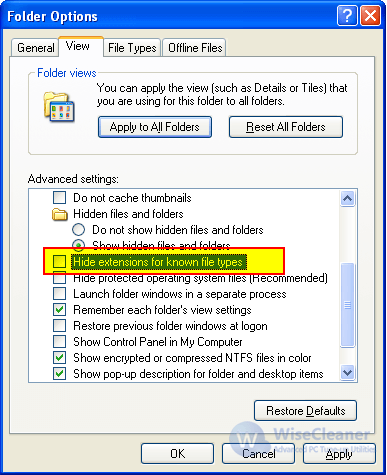
5. Click the button "Apply to All Folders". Then click "Apply" and then "OK".
1. Click the Start menu. This is the round icon that is on the bottom left corner of your screen.
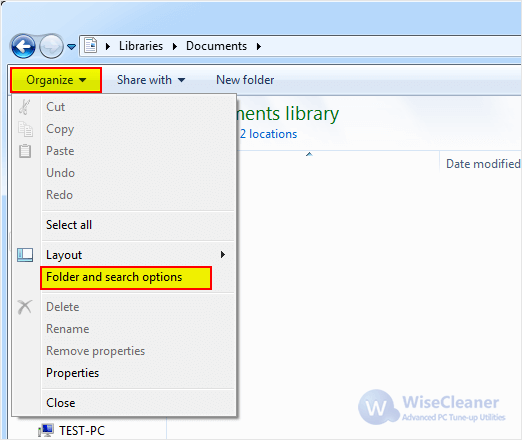
2. Type "folder options" (without the quotes). Click the line "Folder Options" that appears at the top of the Start menu. You also can open a folder, click "Organize" in the left, and then click "Folder and search options".
3. A dialog box with the title "Folder Options" will appear. Click the "View" tab at the top of the window.
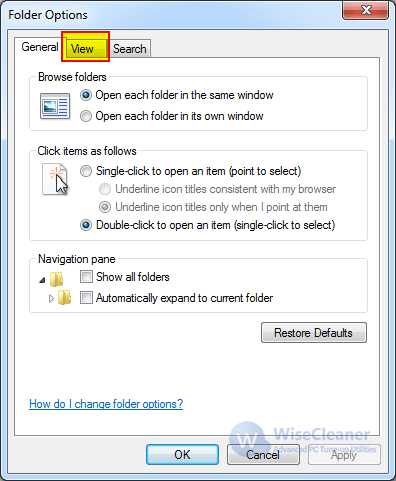
4. Click to uncheck the box for "Hide extensions for known file types".
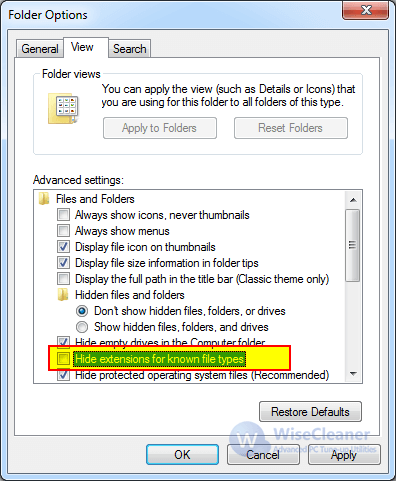
5. Click the "OK" button at the bottom of the dialog box.
1. Press the Windows key + E on the keyboard to open the File Explorer.
2. Click the "View" tab, find "Options" and click the drop-down menu, and click "Change folder and search options".
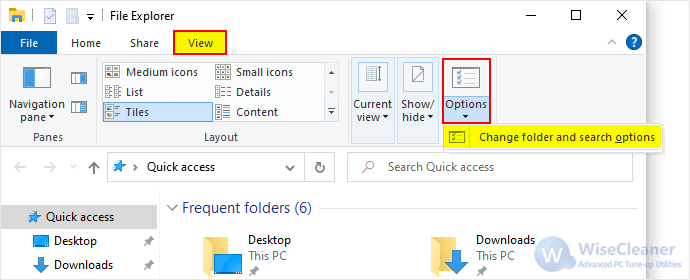
3. Click the "View" tab in the Folder Options window.
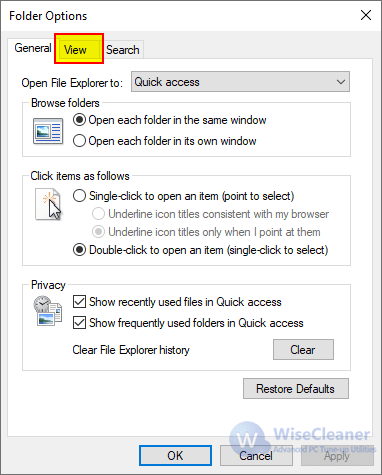
4. Look for the line "Hide extensions of known file types" and click the box beside it to remove the tick.
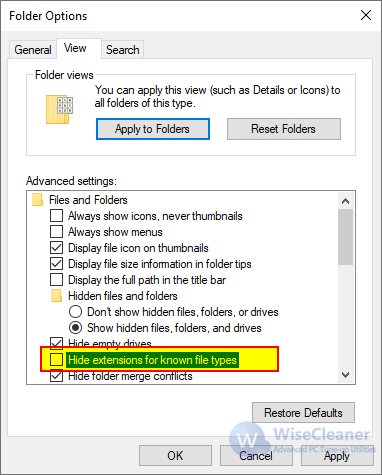
5. Click the OK button.
1. Holde the Windows key + E on the keyboard to open Windows Explorer.
2. Click the three dots icon next to the View button. Then click "Option" in the drop-down menu.
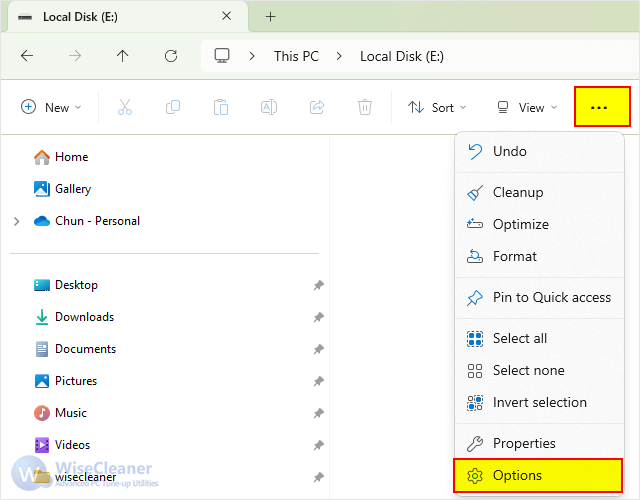
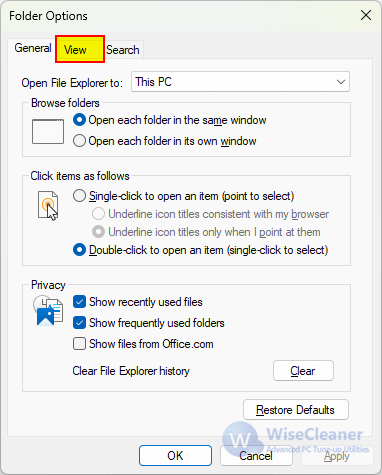
3. Select the "View" tab in the opened "Folder Options" window.
4. Find "Hide extensions for known file types" and deselect it.
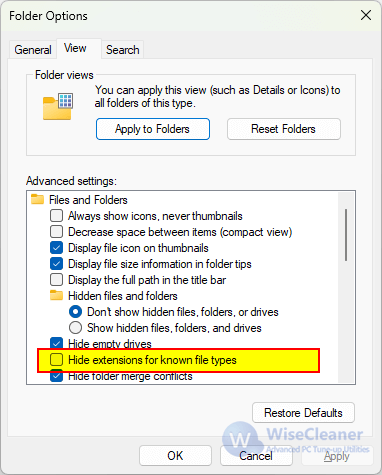
5. Click the Apply button and then click the OK button to apply changes.
That's it. You should now be able to see the true extensions of the files in your Explorer windows.