WiseCleaner Think Tank
Encounter difficult computer problems?
All about maintenance and optimization of your Windows System.
Mar 18, 2025
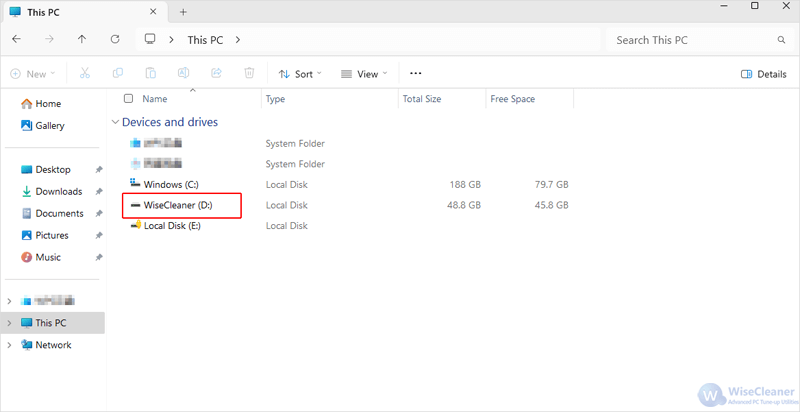
Whether you want to protect personal data or simply keep File Explorer uncluttered, storing sensitive data on a separate drive and then hiding the entire drive in File Explorer is a more effective and simplified solution than hiding individual files or encrypting data.
This guide will walk you through the steps to hide a drive in Windows File Explorer using the Registry Editor.
If you are using Windows 11, follow the steps below:
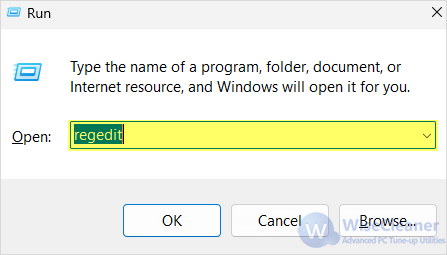
Press the Windows + R key to open the Run dialog box, and then enter “regedit” in it to open the Registry Editor. Before going to the next step, it is necessary to back up your full Windows registry to prevent potential data loss or system issues.
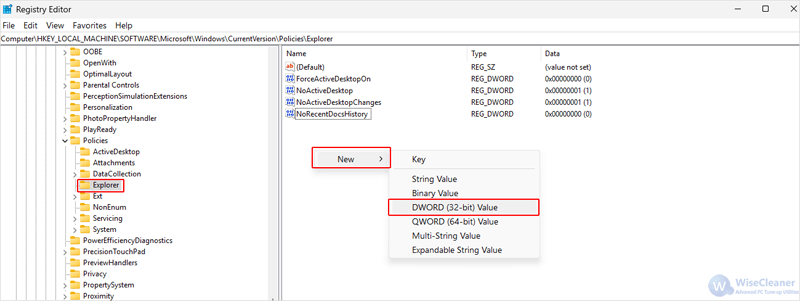
Navigate to the following key in the Registry Editor:
Computer\HKEY_LOCAL_MACHINE\SOFTWARE\Microsoft\Windows\CurrentVersion\Policies\Explorer

On the right-side pane within the Explorer key, right-click on a blank area and select New > DWORD (32-bit) Value. Name the new value NoDrives.
Right-click on the NoDrives value, select Modify... from the context menu. On the Edit Value window that pops up, change the Value data to the binary value of the drive letter you want to hide and click on OK:

For the changes to take effect, close the Registry Editor, and then restart File Explorer.
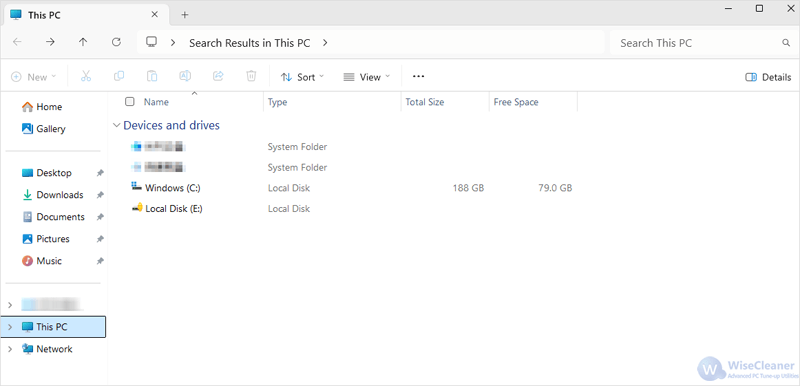
After following the steps in this WiseCleaner article, the icon of the drive you chose will disappear from File Explorer, allowing you to protect the data in it from prying eyes.
wisecleaner uses cookies to improve content and ensure you get the best experience on our website. Continue to browse our website agreeing to our privacy policy.
I Accept


