WiseCleaner Think Tank
Encounter difficult computer problems?
All about maintenance and optimization of your Windows System.
Mar 13, 2025
Local Security Policy in Windows 11 is an essential tool for managing security settings, establishing rules, and ensuring that your system is configured to protect sensitive data. It's a feature more commonly used by system administrators to manage group policies in larger organizational settings, but it can be useful for individual users as well, who wish to have more control over their PC’s security settings.
LSP is a set of information about the security of a local computer, including several main features as below:
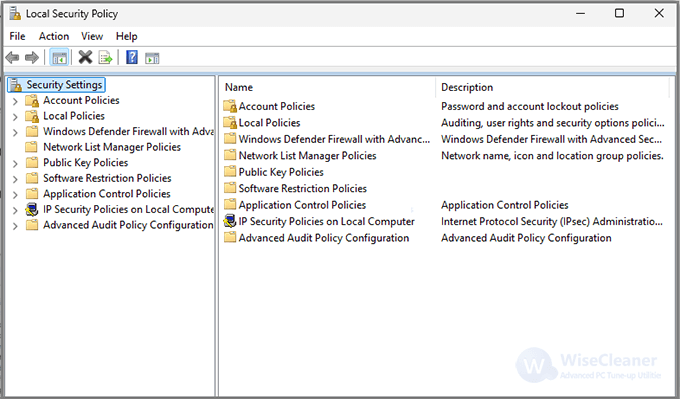
There are several methods to access the Local Security Policy on a Windows 11 system, depending on your preferences and access permissions.
Windows Search offers the quickest way to open any program or setting on your Windows 11 PC. It can also open the Local Security Policy window, where you can explore different security options and adjust settings as needed.
1. Use the keyboard shortcut Win + S to access the Windows search bar quickly.
2. Type Local Security Policy into the search box. From the search results, click on the Local Security Policy app.
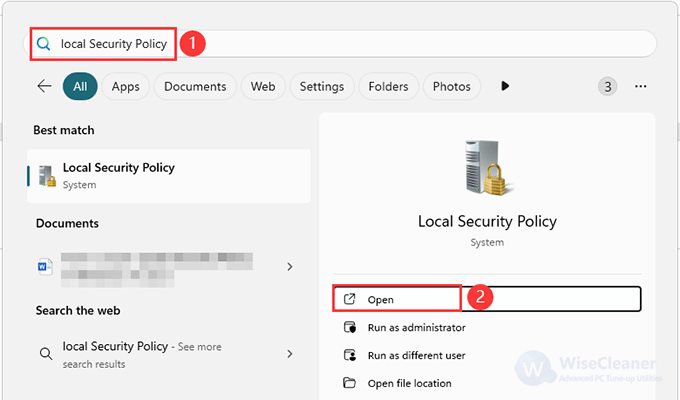
If you do not find it in the results, make sure you have administrative privileges, as this tool may not be available in all editions of Windows 11.
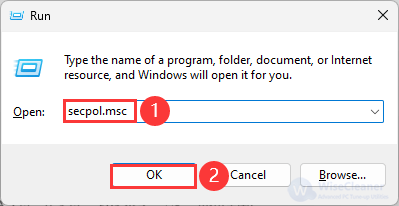
Another quick and easy way to open the Local Security Policy is to use the Run command. This method is useful if you prefer keyboard shortcuts to get things done faster on your PC.
1. Press Win + R on your keyboard to open the Run dialog box.
2. Enter secpol.msc in the text field and press Enter. This command will directly open the Local Security Policy window.
The Start Menu is your go-to spot for all your favorite programs and settings on your Windows PC. It's also a quick and easy way to access Local Security Policy.
1. Click on the Start menu to open.
2. Hit All at the top right. Scroll down until you see the Windows Tools folder, then click to open it.
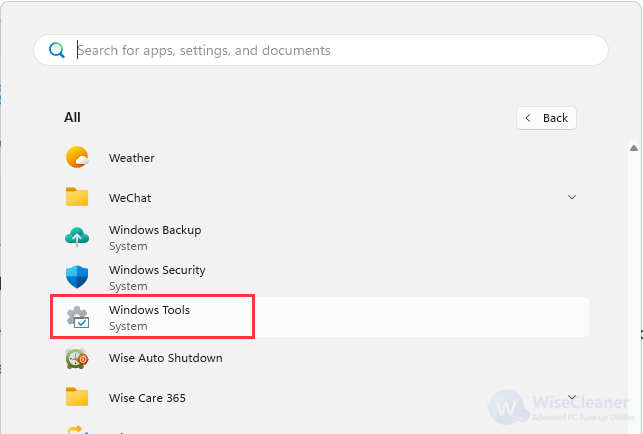
3. Inside, you'll find the Local Security Policy option.
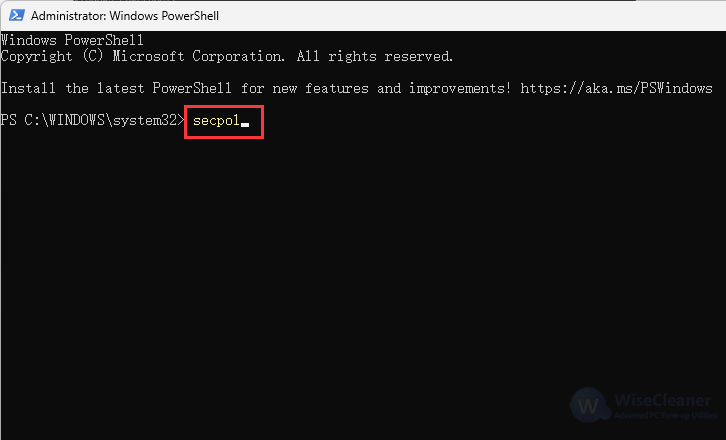
1. Press Win + S to open the Search bar, type in PowerShell, and then click Run as administrator.
2. Type secpol and press Enter. This command will open the Local Security Policy directly.
The Local Security Policy tool in Windows 11 provides a powerful way to manage and implement security protocols. Whether you're enhancing security for personal use or managing multiple machines, this tool offers deep customization options for ensuring that your data remains safe. Now, you can access it easily by following this guide.