WiseCleaner Think Tank
Encounter difficult computer problems?
All about maintenance and optimization of your Windows System.
Feb 10, 2025
Windows 11 introduced various security features to enhance system protection, and one of these is Virtualization-Based Security (VBS). While VBS improves security by creating a secure memory region isolated from the rest of the OS, it can also impact gaming and overall system performance, especially on certain hardware. If you prioritize performance over added security, you may want to disable VBS. This guide will walk you how to turn it off.
Before disabling VBS, it’s important to check whether it’s currently active on your system.
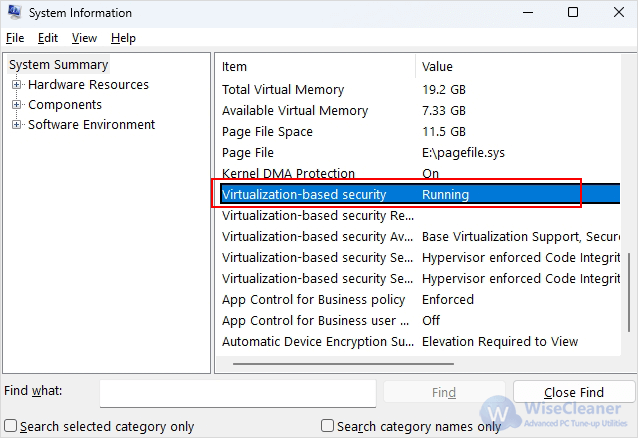
1. Press Win + R, type msinfo32, and hit Enter. This will open System Information.
2. Scroll down to Virtualization-Based Security under System Summary. Check whether VBS is enabled.
If VBS is enabled and you want to disable it, follow the methods below.
Using Windows Settings is the easiest way to disable VBS. Here’s how to.
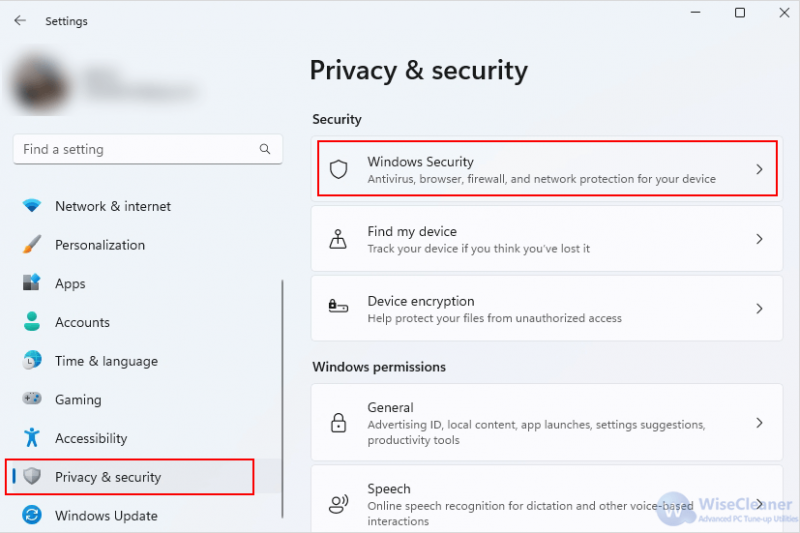
1. Press Win + I to open Settings.
2. Navigate to Privacy & security > Windows Security.
3. Click Device security > Core isolation details.
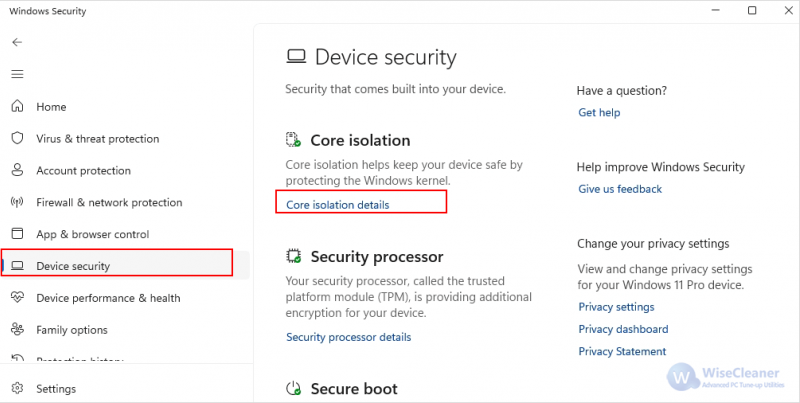
4. Toggle off Memory Integrity. Then, restart PC and check if the VBS is disabled now.

For users comfortable editing the Windows Registry, this method allows disabling VBS manually. Be cautious while modifying registry values to prevent unintended issues.
1. Press Win + R, type regedit, and press Enter.
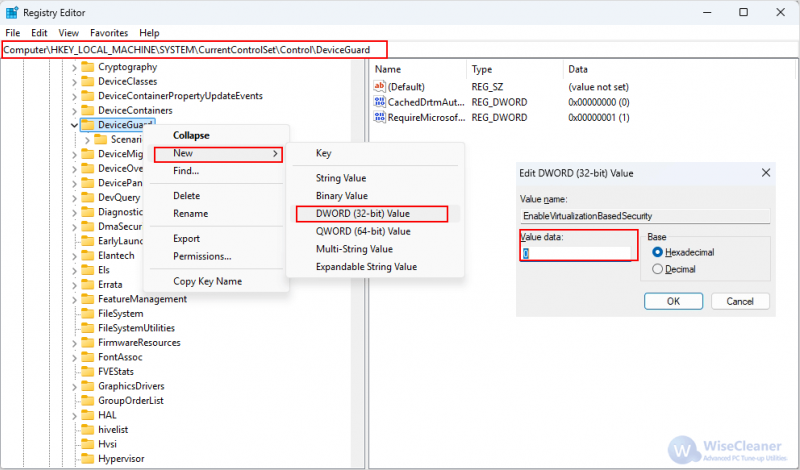
2. Navigate to:
HKEY_LOCAL_MACHINE\System\CurrentControlSet\Control\DeviceGuard
3. In the right panel, find the EnableVirtualizationBasedSecurity key, if it doesn’t exist, right-click DeviceGuard, select New > DWORD (32-bit) Value, and name it EnableVirtualizationBasedSecurity. Then set its value to 0.
If you are using Windows 11 Pro or Enterprise, you can disable VBS via Group Policy Editor.
1. Press Win + R, type gpedit.msc, and press Enter.
2. Navigate to:
Computer Configuration > Administrative Templates > System > Device Guard
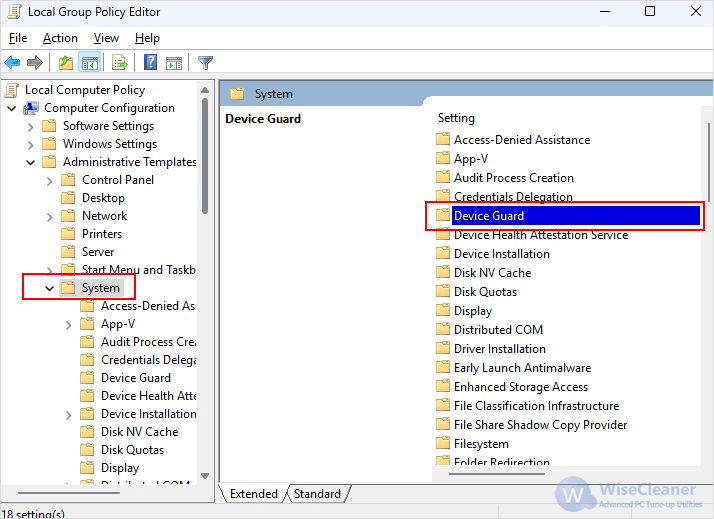
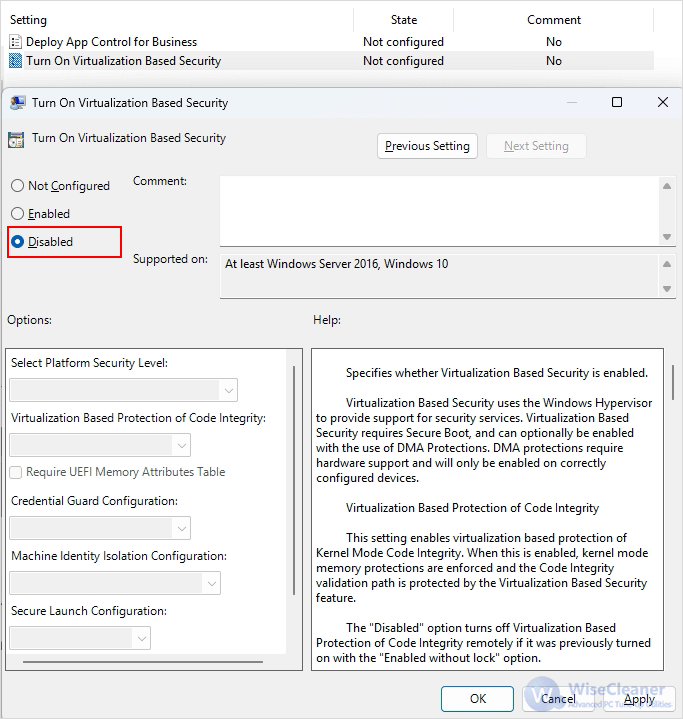
3. Double-click Turn On Virtualization Based Security.
4. Select Disabled, then click Apply and OK.
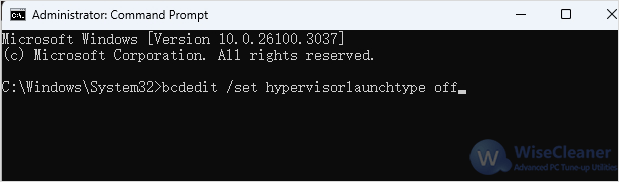
For advanced users, disabling VBS using Command Prompt is a quick and efficient method.
1. Type cmd in the search bar and choose Run as administrator to launch the command prompt.
2. Type the following command and press Enter:
bcdedit /set hypervisorlaunchtype off
Disabling VBS can lead to a noticeable improvement in gaming and overall system performance, but it may reduce security protections. If you frequently use virtualization features or handle sensitive data, consider keeping it enabled. However, if performance is your priority, following the steps above will help you turn it off effectively.
Additional Related Articles
wisecleaner uses cookies to improve content and ensure you get the best experience on our website. Continue to browse our website agreeing to our privacy policy.
I Accept


