WiseCleaner Think Tank
Encounter difficult computer problems?
All about maintenance and optimization of your Windows System.
Dec 13, 2024
Windows 11 includes a built-in “Super Administrator” account, also known as the “Administrator” account. This account provides elevated privileges, granting unrestricted access to the operating system’s features and settings. By default, this account is disabled for security reasons. However, there are instances where activating it can be useful, such as troubleshooting system issues or making system-wide changes. This guide will show you how to enable and disable the Super Administrator account in Windows 11.
Command Prompt is a versatile tool that allows you to perform various administrative tasks in Windows 11. Follow these steps to enable the Super Administrator account.
1. Press Win + S, type Command Prompt, and select Run as Administrator.
2. Type the following command and press Enter:
Net user administrator /active:yes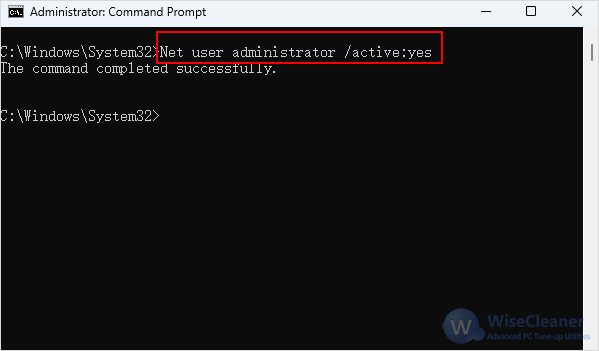
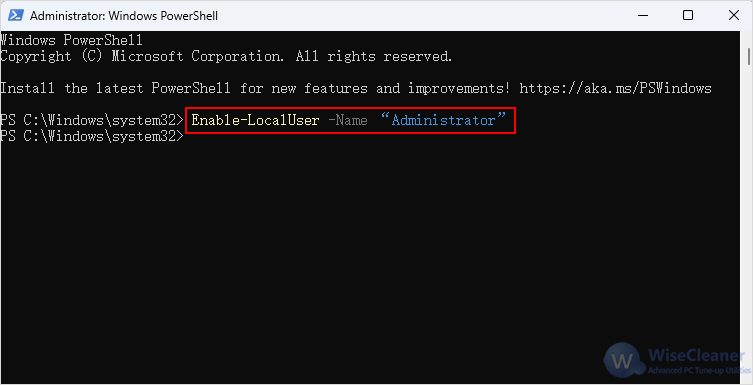
PowerShell is another command-line tool in Windows 11 that offers more advanced features compared to Command Prompt. Here's how to:
1. Search for PowerShell in the Start menu, right-click it, and select Run as administrator.
2. Type the following command and press Enter:
Enable-LocalUser -Name “Administrator”
The Local Group Policy Editor allows you to manage various system settings and policies. This method works only on Windows 11 Pro, Enterprise, or Education editions.
1. Press Win + R, type gpedit.msc and press Enter to open Local Group Policy Editor.
2. Navigate to Computer Configuration > Windows Settings > Security Settings > Local Policies > Security Options.
3. In the right pane, find Accounts: Administrator account status and double-click it.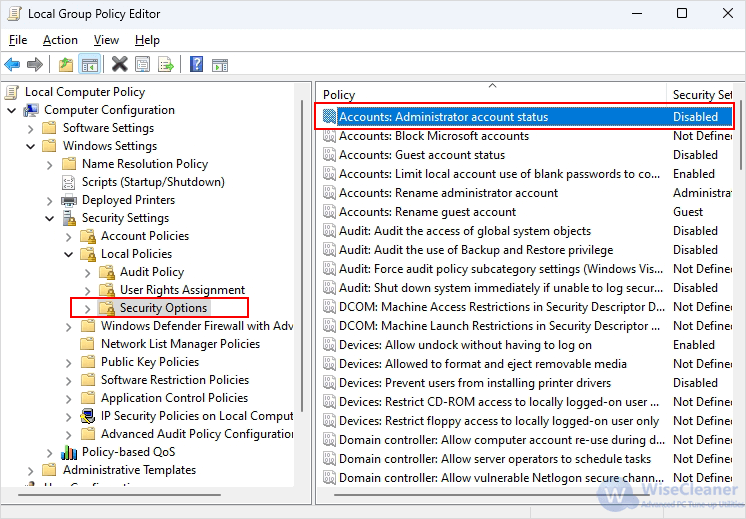
4. In the properties window, select Enabled and click OK.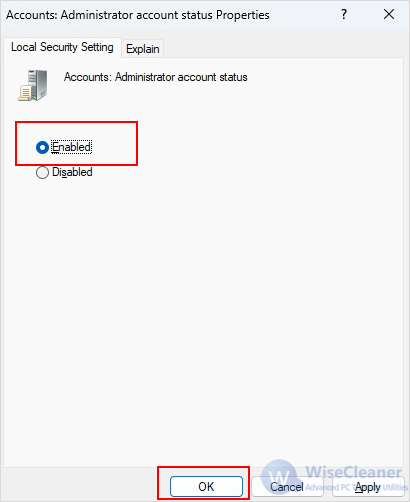
Local Users and Groups allows you to manage several users and memberships locally saved on your computer. This method has the same restrictions on Windows versions as the previous method.
1. Press Win + R, type lusrmgr.msc and press Enter to run Local Users and Groups.
2. In the left pane, click Users.
3. In the middle pane, find and double-click Administrator.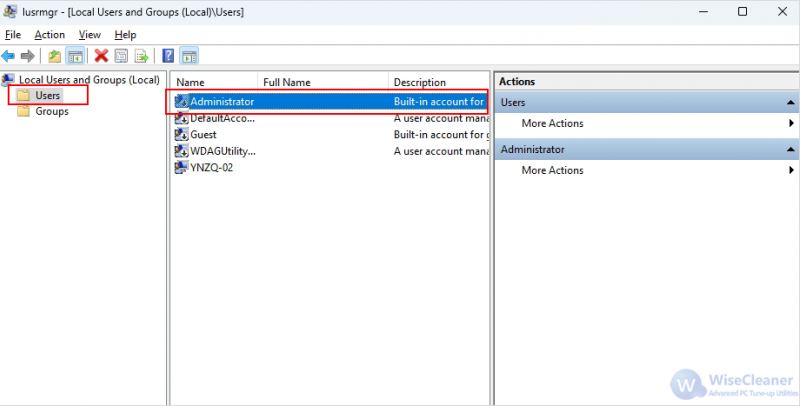
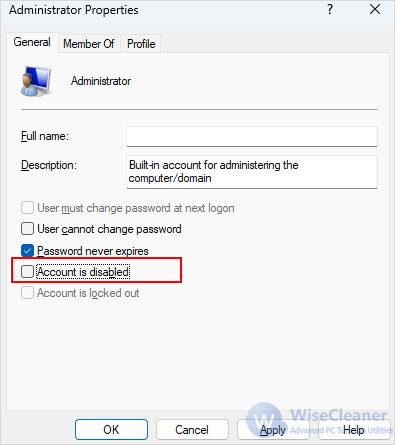
However, using this account poses risks. It bypasses User Account Control (UAC) and can inadvertently cause system-wide changes. Activate it only when necessary and ensure it’s disabled when no longer needed.
Net user administrator /active:noDisable-LocalUser -Name “Administrator”Activating the Super Administrator account in Windows 11 can be a powerful tool for advanced troubleshooting and system configuration. However, always exercise caution and disable the account when not in use to maintain system security.