WiseCleaner Think Tank
Encounter difficult computer problems?
All about maintenance and optimization of your Windows System.
Dec 11, 2024
On the desktop of your Windows PC and within the File Explorer, icons play an important role in providing a visual representation of applications and files.
Over time, the icon cache can become corrupted and cause issues due to system updates, software installations or malware. When this happens, you may encounter incorrect, missing or blank icons.
Luckily, clearing and rebuilding the icon cache is a straightforward method to resolve these issues. This WiseCleaner guide explains how to clear and rebuild the icon cache using the built-in ways on Windows 11.
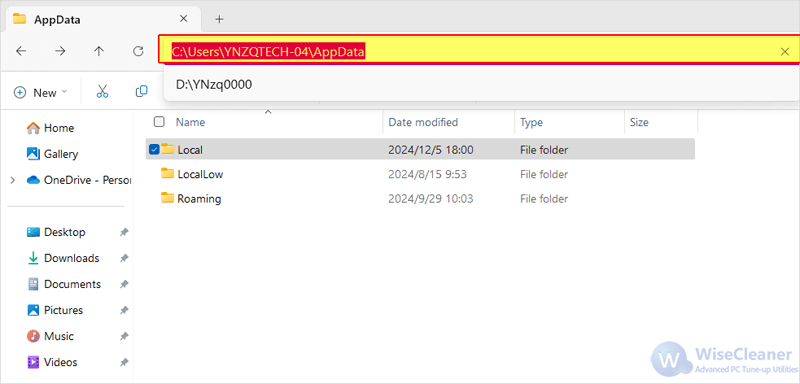
Press the Windows key + E on your keyboard to open File Explorer straightly.
With File Explorer, access to the folder below:
C:\Users\Your Username\AppData\Local

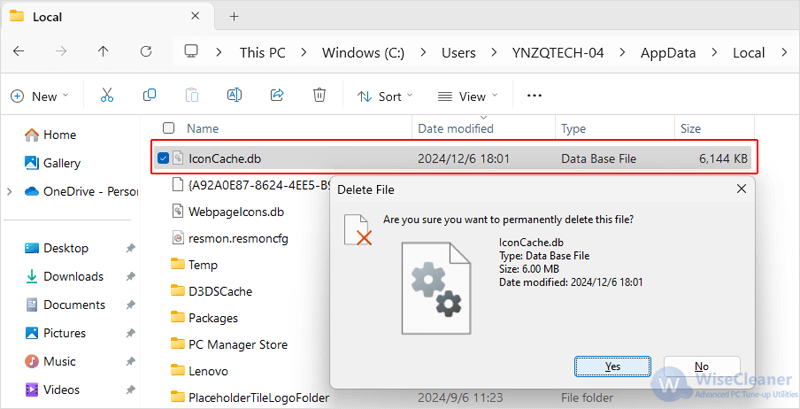
Scroll down to look for a file named IconCache.db. Press Shift + Delete to permanently delete it.

Finally, restart your computer and the cache will be rebuilt automatically after booting up.
If you prefer a more advanced method, you can delete the icon cache in the Command Prompt. Before starting, save your work and close all open applications, as this process will end the Windows Explorer task.
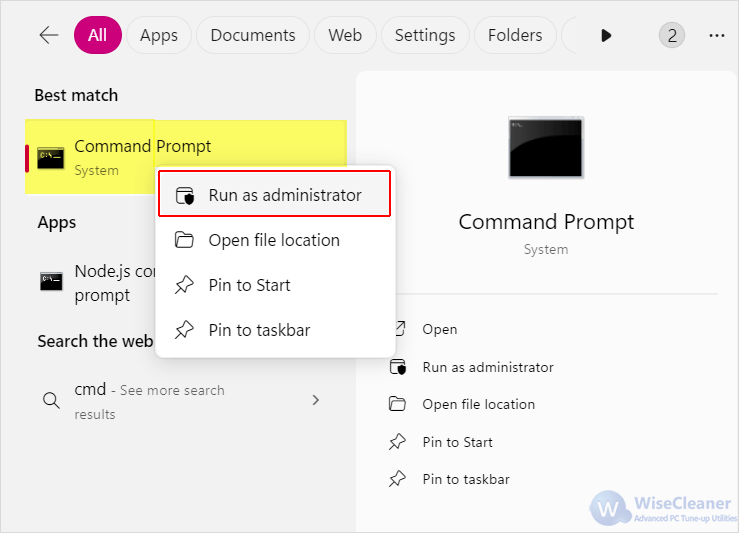
Enter cmd in the Search bar. Right-click on the matching result and choose Run as Administrator to open the Command Prompt.

In Command Prompt, enter the following command to close all Windows Explorer processes:
taskkill /f /im explorer.exe
After entering this command, your desktop and taskbar will temporarily disappear, which is normal. Please move to the next step.

Next, copy, paste and then Enter the following commands one by one into the interface of Command Prompt to delete all the files that begin with “iconcache”:
cd /d %userprofile%\AppData\Local
del iconcache.db /a

Now, restart Windows Explorer by typing the following command and pressing Enter in CMD:
start explorer.exe

You may also want to restart your computer to ensure that the cache is fully rebuilt.
Cleaning and rebuilding the icon cache on your Windows 11 can resolve various icon display issues. Follow the steps above to restore your icons to their correct state simply.