WiseCleaner Think Tank
Encounter difficult computer problems?
All about maintenance and optimization of your Windows System.
Oct 23, 2024
Managing your network connections is essential for maintaining a stable internet experience on your Windows 11 device. Whether you're troubleshooting connectivity issues, switching between networks, or simply looking to save battery life, knowing how to enable or disable your Wi-Fi and Ethernet adapters is crucial. Here’s a step-by-step guide on how to do it.
The easiest method to enable or disable the Network Adapter is through Settings. Here’s how to:
1. Click on the Start menu and select Settings or press Win + I.
2. In the Settings window, click on Network & Internet > Advanced network settings.
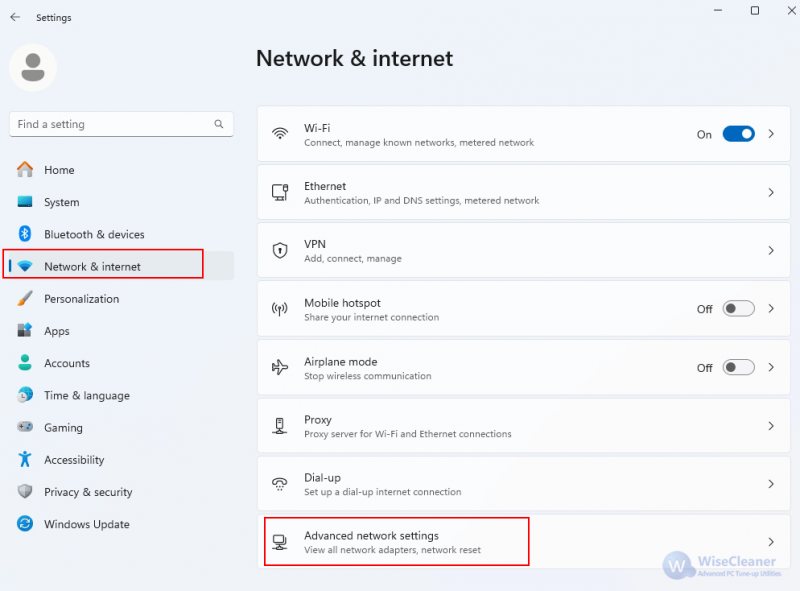
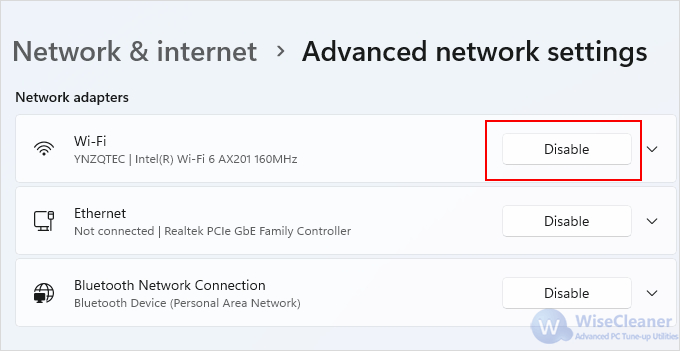
3. Under the Network adapters section, you will see your network adapters, including Wi-Fi and Ethernet. Select the Disable or Enable button based on your needs.
It's also possible to use Device Manager to enable or disable network adapters, follow these steps:
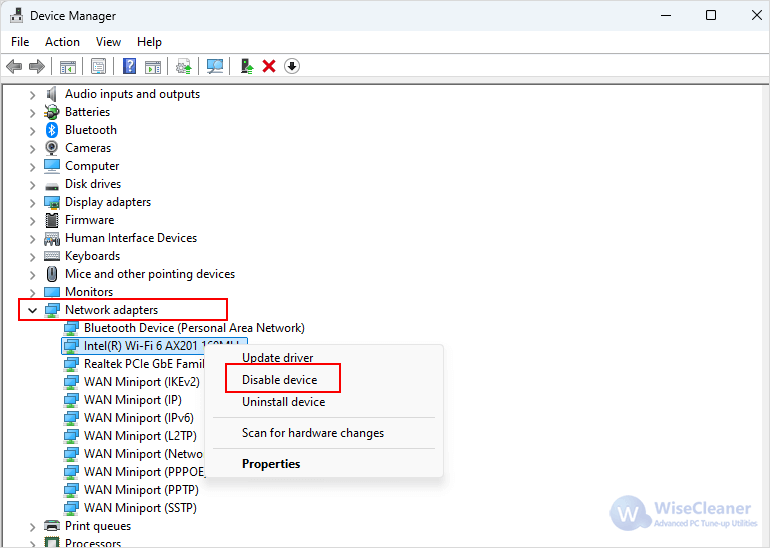
1. Right-click on the Start button and select Device Manager from the menu to open the Device Manager.
2. Expand the Network adapters section to see all installed network devices.
3. Right-click on the Wi-Fi or Ethernet adapter you want to manage and choose Disable device to turn it off, or select Enable device to turn it back on.
For those who prefer using the command line, you can enable or disable network adapters using Command Prompt.
1. Search for Command Prompt in the search bar and select Run as administrator.
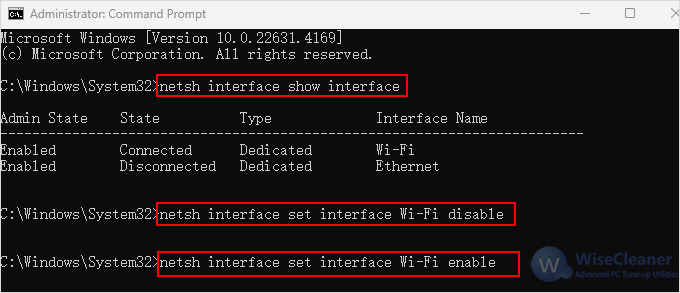
2. Type the following command and press Enter to see a list of network adapters:
netsh interface show interface
3. To disable an adapter, type:
netsh interface set interface "AdapterName" disable
Replace "AdapterName" with the name of your adapter (e.g., "Wi-Fi" or "Ethernet").
4. To enable it again, type:
netsh interface set interface "AdapterName" enable
Enabling or disabling your Wi-Fi and Ethernet network adapters on Windows 11 is a straightforward process. Above methods give you control over your network connections, allowing you to troubleshoot issues, manage resources, and optimize your internet experience effectively.
wisecleaner uses cookies to improve content and ensure you get the best experience on our website. Continue to browse our website agreeing to our privacy policy.
I Accept


