WiseCleaner Think Tank
Encounter difficult computer problems?
All about maintenance and optimization of your Windows System.
Sep 27, 2024
The Trusted Platform Module (TPM) is a crucial component of modern computing, enhancing security by providing hardware-based protection for sensitive information, including encryption keys and credentials. On Windows 11, you may need to clear the TPM for various reasons, such as preparing a device for resale, troubleshooting issues, or resetting security settings. This article will guide you through the process of clearing TPM on Windows 11.
1. Reselling Your Device: If you're planning to sell your PC, clearing the TPM ensures that all your personal data, including encrypted information, is removed from the device.
2. Troubleshooting Issues: If you're experiencing problems with Windows features that rely on TPM, such as BitLocker, clearing the TPM can help reset its state and resolve potential issues.
3. Resetting Security Settings: Clearing the TPM can help you reconfigure security settings, especially if you’ve made changes that require a fresh start.
4. Upgrading Hardware: If you upgrade your hardware, clearing the TPM can help ensure compatibility with the new components.
Clearing the TPM will reset it to factory defaults and remove all stored keys, so make sure to back up any important data before proceeding.
The most straightforward way to clear TPM is through the TPM Management Console. You can use it to enable or disable TPM, clear TPM, and manage TPM keys.
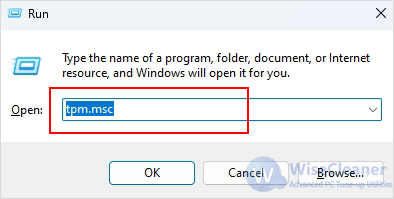
1. Press Win + R to open the Run dialog, type tpm.msc and hit Enter.
2. In the Actions pane on the right, click on Clear TPM and select Restart.
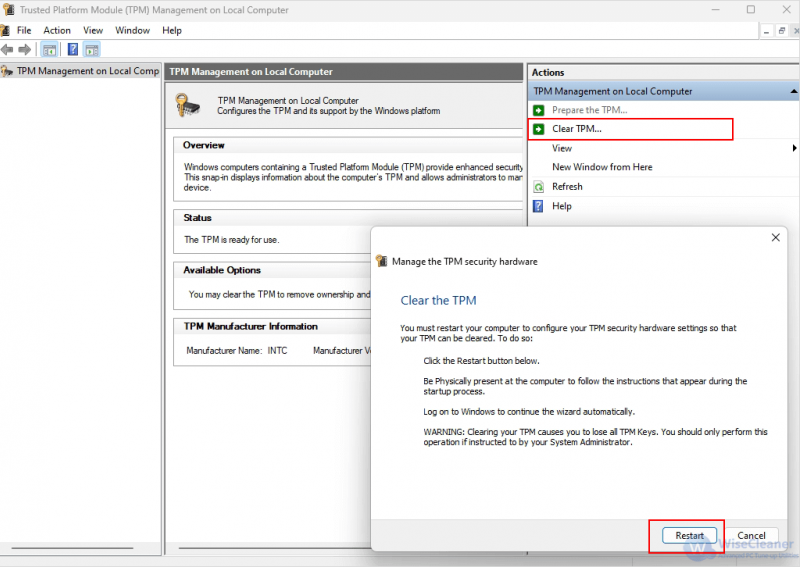
3. After restarting, you’ll see a prompt to confirm clearing the TPM. Follow the instructions to complete the process.
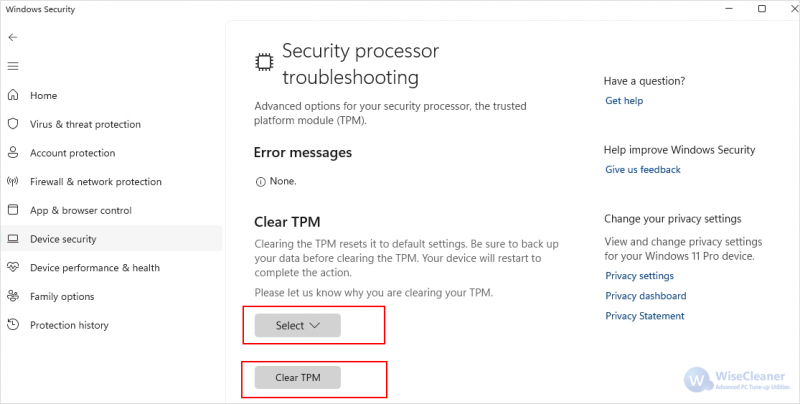
Windows Security can also clear TPM, here's how.
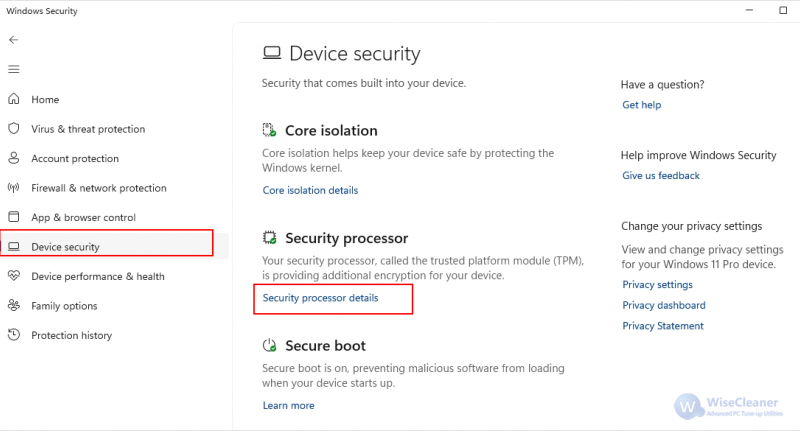
1. Type Windows Security in the search bar, then select it from the results.
2. Click on Device security in the left pane, then select Security processor details under the Security processor section.
3. Click on Security processor troubleshooting.
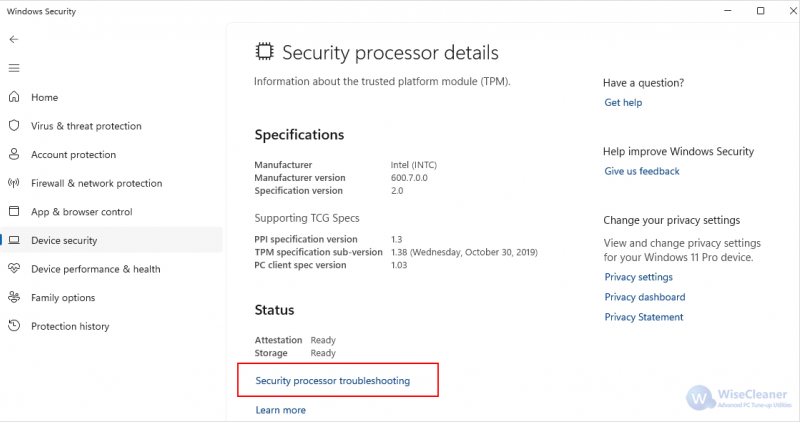
4. Select a reason why you are clearing the TPM and click Clear TPM.
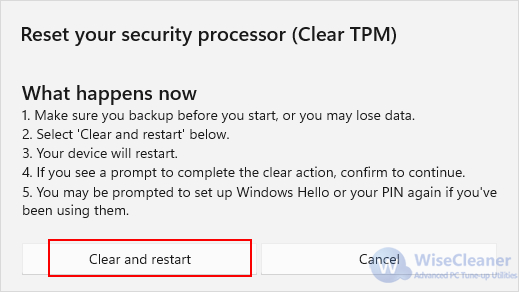
5. Click on Clear and restart and follow the on-screen instructions to complete the clearing process.
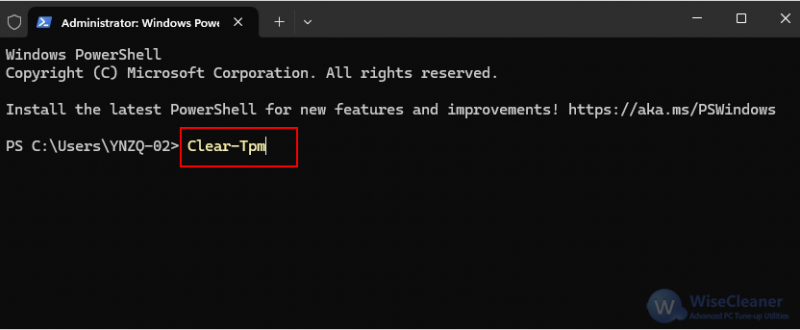
For those who prefer to use the command line, Windows PowerShell can clean up the TPM as well. Here's how.
1. Right-click on the Start menu and select Terminal (Admin) to open Windows PowerShell.
2. Type the following command and press Enter:
Clear-Tpm
Clearing the TPM on Windows 11 can help resolve various security-related issues and prepare your device for new configurations. Whichever method you use, follow the steps carefully to ensure a smooth process. Always remember to back up important data before making significant changes to your system settings.
wisecleaner uses cookies to improve content and ensure you get the best experience on our website. Continue to browse our website agreeing to our privacy policy.
I Accept


