WiseCleaner Think Tank
Encounter difficult computer problems?
All about maintenance and optimization of your Windows System.
Sep 20, 2024
Dealing with multiple time zones is common in our increasingly globalized world, especially if you work across different regions or have frequent interactions with international clients, colleagues, friends or family.
That is why Windows 11 offers a handy feature for users to manage multiple time zones directly on the Taskbar. In this WiseCleaner post, we will guide you through the process of setting up and using multiple time zones on your Windows 11 PC.
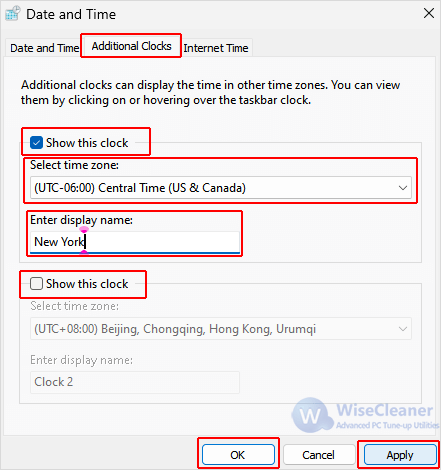
Windows 11 allows you to add two additional time zones to your system clock. Follow below steps to set multiple time zones on your Windows 11:
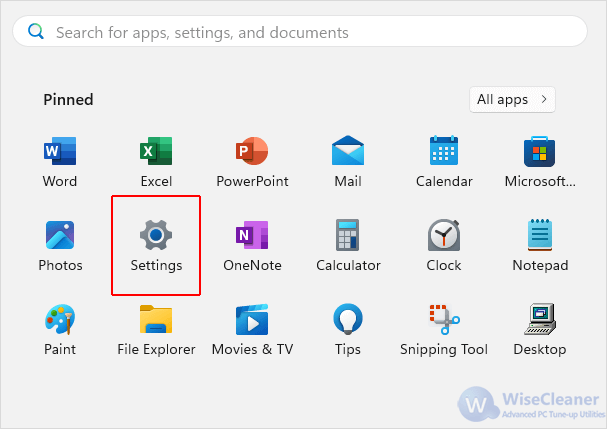
Click Start (the windows icon) on the Taskbar or press the Windows key on your keyboard, and select Settings (the gear icon) to open the Windows Settings app.
Additionally, pressing the Windows key + I on your keyboard can also open it directly.
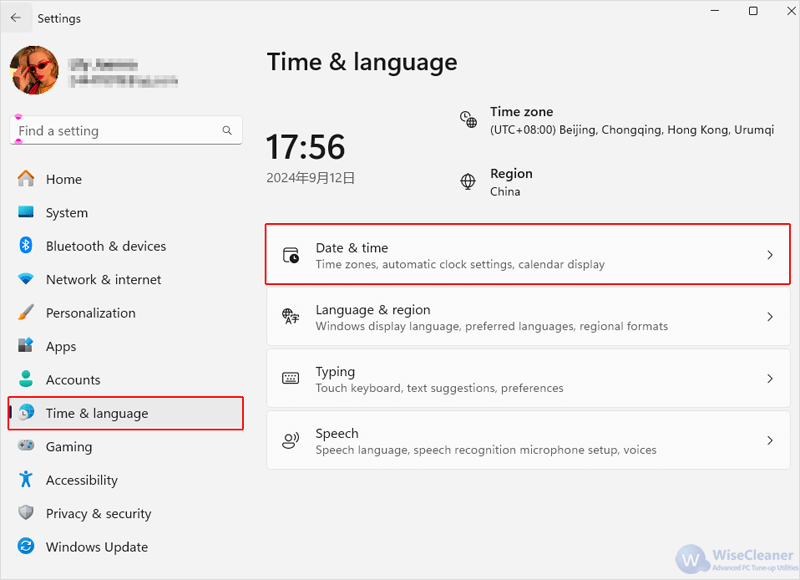
In the Settings window, find and select Time & language from the left side, then click on Date & time from the options available on the right side.
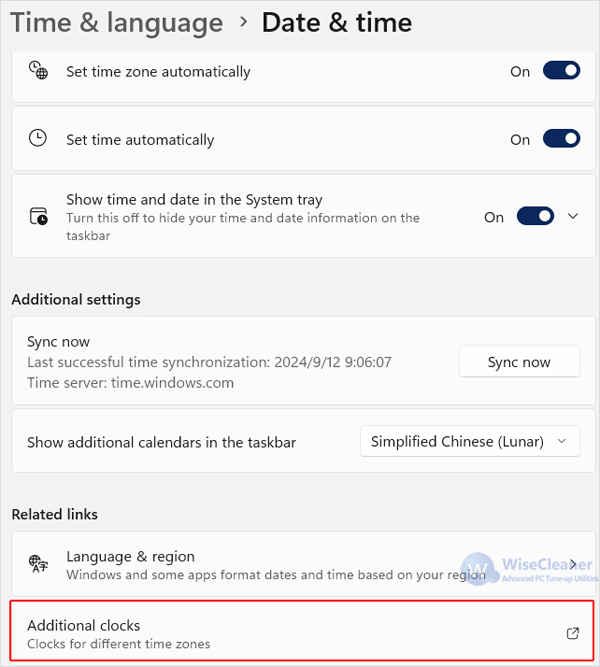
In the Date & time settings page, you will see options for setting your primary time zone. Ensure that it is set correctly.
Then scroll down and click on Additional clocks under the Related links section to add additional time zones.
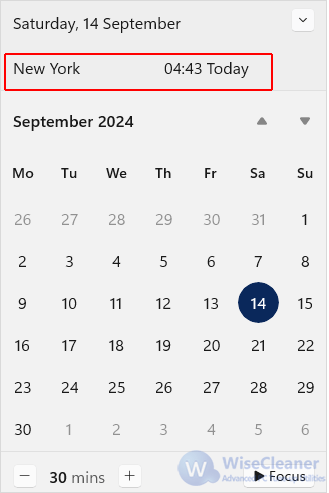
To view your additional clocks, simply click on the date and time section displayed in the bottom right corner of the taskbar.
A pop-up will appear, showing the current time prominently while showing your additional clocks below it.
Synchronize your clocks: Make sure your PC is set to automatically synchronize with an internet time server. This ensures all clocks, including your additional time zones, display accurate time.
Change time formats: If you prefer a 24-hour format or different date display, you can adjust these settings in Settings > Time & language > Date & time > Language & region.
By following these simple steps in this WiseCleaner, you can now easily view multiple time zones at a glance on the Taskbar without opening any additional apps or websites.