WiseCleaner Think Tank
Encounter difficult computer problems?
All about maintenance and optimization of your Windows System.
Sep 14, 2024
Hyper-V is a built-in virtualization technology in Windows 11 that allows you to create and run virtual machines (VMs) on your PC. It’s an incredibly useful feature for developers, IT professionals, and anyone who needs to test software or run different operating systems without affecting their main system. In this article, we'll guide you through enabling Hyper-V in Windows 11.
Hyper-V is a hypervisor-based virtualization tool provided by Microsoft, which allows users to run multiple operating systems on a single physical machine. Each OS runs within its own virtual machine, ensuring isolation and efficient resource usage. This is ideal for running Linux distributions, older versions of Windows, or testing software in a sandboxed environment.
You can enable Hyper-V in Windows 11 in 3 quick and easy ways, follow these steps:
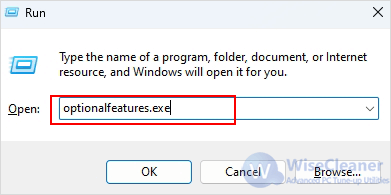
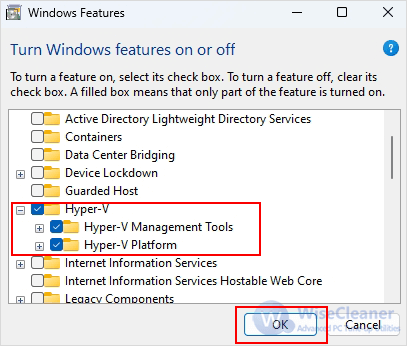
The easiest and most straightforward way to enable Hyper-V is to use the Windows Features dialog. Here's how to do it:
Alternatively, you can enable Hyper-V using Command Prompt:
DISM /Online /Enable-Feature /All /FeatureName:Microsoft-Hyper-V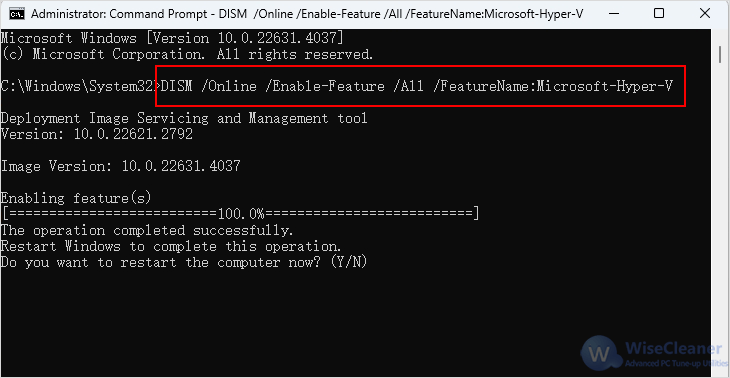
If you prefer using PowerShell, you also can enable Hyper-V by running a simple command.
Enable-WindowsOptionalFeature -Online -FeatureName Microsoft-Hyper-V-All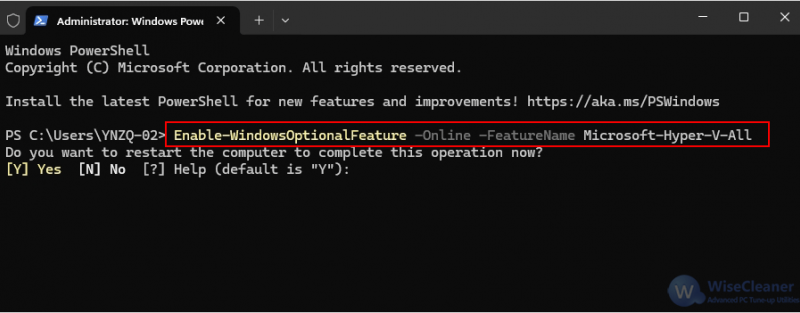
Enabling Hyper-V in Windows 11 is a straightforward process that can unlock powerful virtualization capabilities on your PC. Whether you need it for development, testing, or other purposes, following these steps will help you enable Hyper-V with ease.