WiseCleaner Think Tank
Encounter difficult computer problems?
All about maintenance and optimization of your Windows System.
Aug 30, 2024
As technology continues to advance, securing our computers becomes increasingly crucial. One common method of unauthorized data transfer is through USB ports, which necessitates the need for disabling USB ports, especially in environments where data protection is paramount, such as corporate offices or public-access computers. Windows 11 offers several methods to disable USB ports efficiently. This article will guide you through each method step-by-step.
One of the quickest ways to disable the USB ports is by disabling the USB control using the Device Manager on your Windows 11.
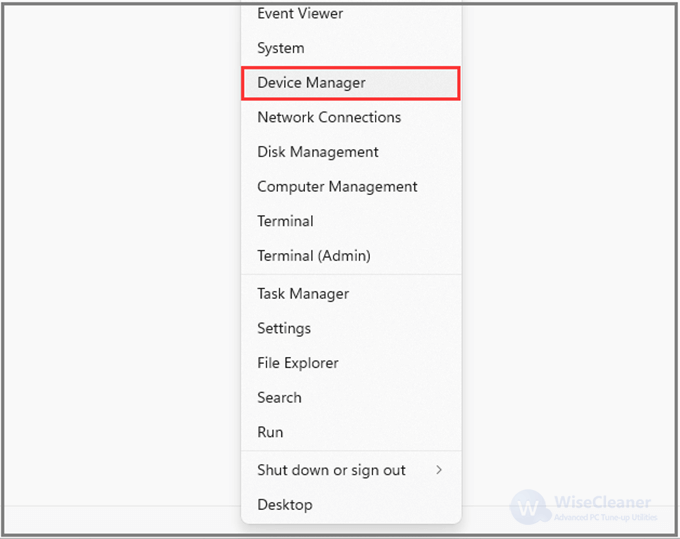
Press Win + X to open the Power User Menu, and then select the Device Manager option from the list.
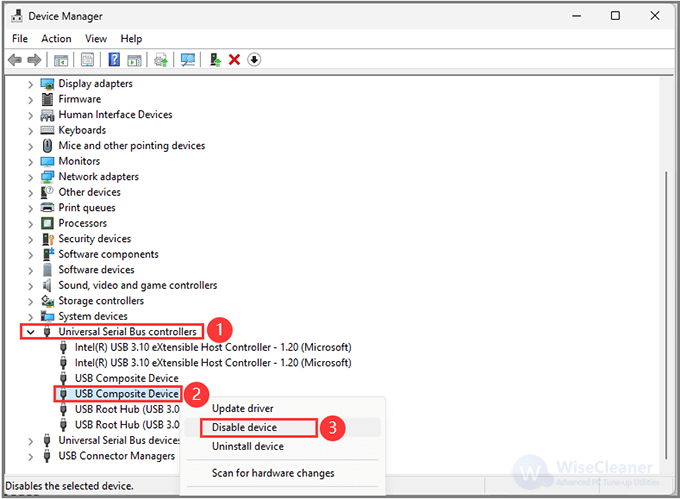
In the Device Manager window, scroll down and find Universal Serial Bus controllers. Expand the list by clicking the arrow next to it.
Right-click on each item listed under Universal Serial Bus controllers and select Disable device. Confirm any prompts that appear to disable the selected device.
This method effectively disables all USB ports on your system, preventing further use until they are manually enabled again through the same process.
Warning: Modifying the registry can have unintended consequences. It is advised to back up the registry before making any changes.
Press Win + R to open the Run dialog, then type Regedit and hit Enter.
In the Registry Editor, navigate to the following path: HKEY_LOCAL_MACHINE\System\CurrentControlSet\Services\USBSTOR
On the right pane, find the Start entry, right-click on it, select Modify, then change the value data to 4 and click OK.

Changing this value prevents Windows from loading the USB storage driver, effectively disabling USB ports.
You can disable the USB port easily by using the Group Policy Editor. However, this method will only work on the Pro, Enterprise, or Education edition of Windows as Group Policy Editor is not a part of the Home edition of Windows.
Press Win + R to open the Run dialog, then type gpedit.msc and hit Enter.
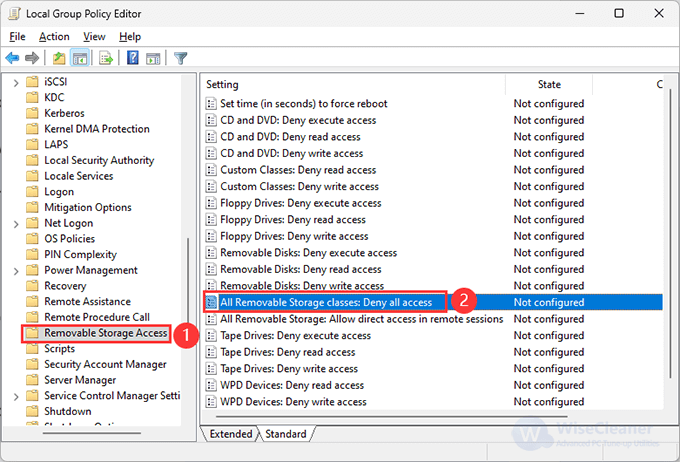
In the Group Policy Editor, head to Computer Configuration> Administrative Templates> System> Removable Storage Access
Locate All Removable Storage classes: Deny all access.
Then, double-click on it and choose Enabled.
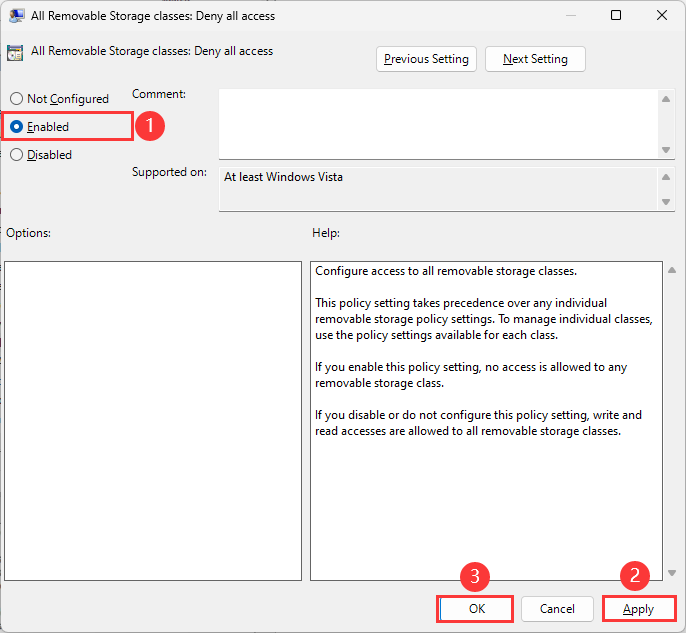
This policy will restrict access to all removable storage, including USB drives.
Another quick way to disable the USB ports on Windows 11 computers is by utilizing the command prompt tool.
Press Win + S to open the Search box, type in cmd to run, then select Run as administrator.
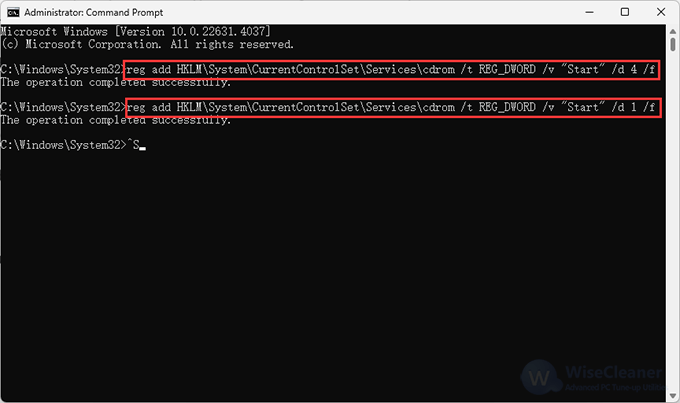
In the command prompt window, type the following command and press the Enter button to execute it.
reg add HKLM\System\CurrentControlSet\Services\cdrom /t REG_DWORD /v "Start" /d 4 /f
The above command will disable all the USB Ports on your device. If you wish to re-enable the USB Ports later, execute the following command:
reg add HKLM\System\CurrentControlSet\Services\cdrom /t REG_DWORD /v "Start" /d 1 /f
By following the steps outlined in this article, you can effectively secure your system against potential vulnerabilities associated with USB devices. Always remember to enable USB ports again when required, following the reverse steps of the method you used, ensuring you also maintain operational flexibility and functionality when necessary.
wisecleaner uses cookies to improve content and ensure you get the best experience on our website. Continue to browse our website agreeing to our privacy policy.
I Accept


