WiseCleaner Think Tank
Encounter difficult computer problems?
All about maintenance and optimization of your Windows System.
Aug 16, 2024
In the modern digital world, efficiency and security are paramount. One feature that embodies both these principles in the Windows operating system is the lock screen timeout. Understanding what the lock screen timeout is and how to manage it effectively can significantly enhance your interaction with your device. In this article, we'll talk about the concept of lock screen timeout and provide a step-by-step guide to changing it in Windows 11.
Lock screen timeout refers to the duration of inactivity before your computer's lock screen is automatically activated. Once the lock screen is displayed, you will need to unlock your device to continue your work. This feature serves two primary purposes:
By default, Windows 11 has a predefined setting for the lock screen timeout, often set to a few minutes of inactivity. While these default settings are suitable for many users, there are various reasons why you might want to change them.
Changing the lock screen timeout in Windows 11 is a straightforward process, even though slightly different from previous versions of Windows. Here’s a step-by-step guide to help you adjust these settings.
The first and simplest way to change screen timeout to turn off display after in Windows 11 is to use Settings.
1. Press Win + I to open Settings
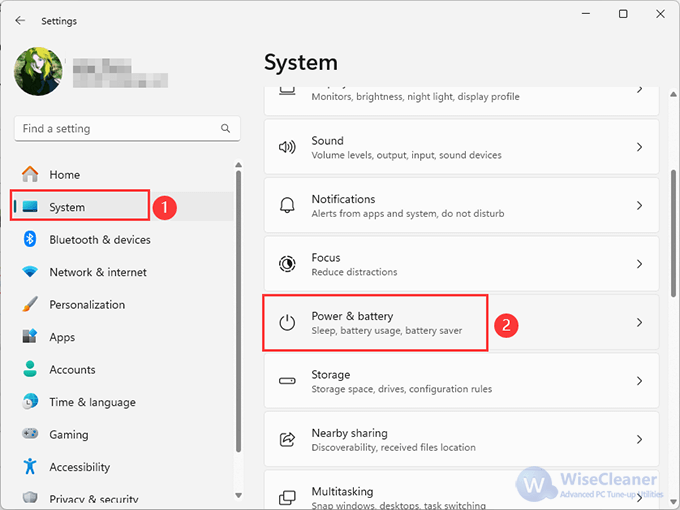
2. Click on System on the left, then Power & battery on the right pane.
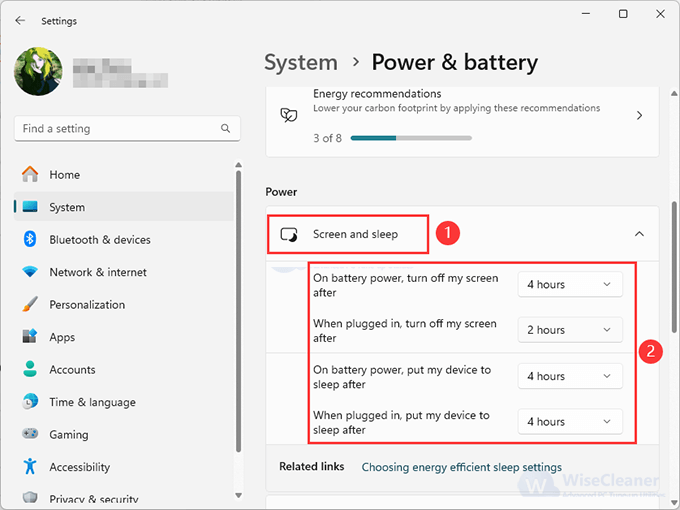
3. Scroll down until you find the Screen and sleep under in the Power section. Here you can adjust the time for turning off the screen and putting your device to sleep for both battery and plugged-in scenarios.
You can also manage the lock screen timeout from the Control Panel.
1. Type Control Panel in the search bar next to the Start button and open it.
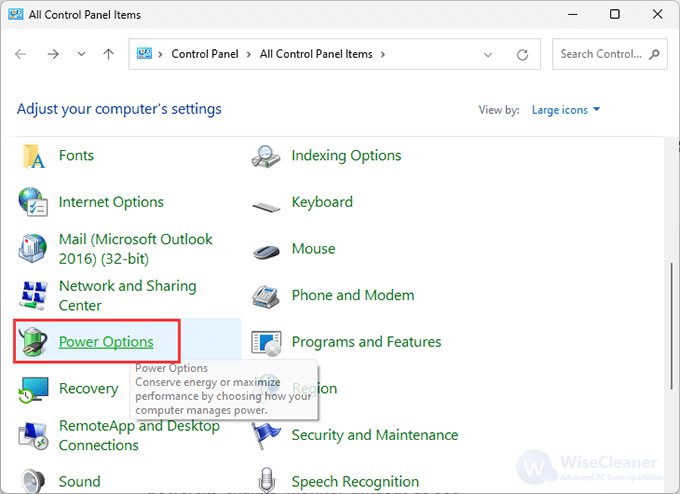
2. Select Power Options to go on.
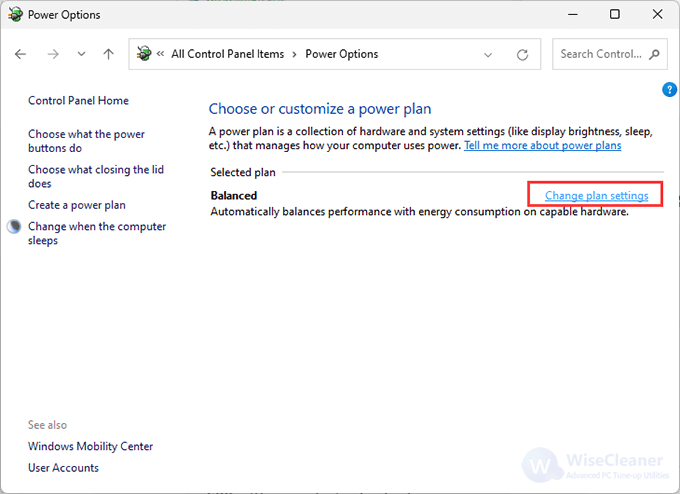
3. Click on Change plan settings next to your selected power plan.
4. Adjust Display and Sleep Settings. Here, you can adjust the settings for turning off the display and putting the computer to sleep.
For more advanced users, changing the lock screen timeout can be accomplished via the Command Prompt.
1. Type cmd in the search bar, right-click on Command Prompt, and select Run as administrator.
2. Execute the following command to set the timeout to your preferred value in seconds (replace 600 with your desired value):
powercfg -change -monitor-timeout-ac 600
powercfg -change -monitor-timeout-dc 600
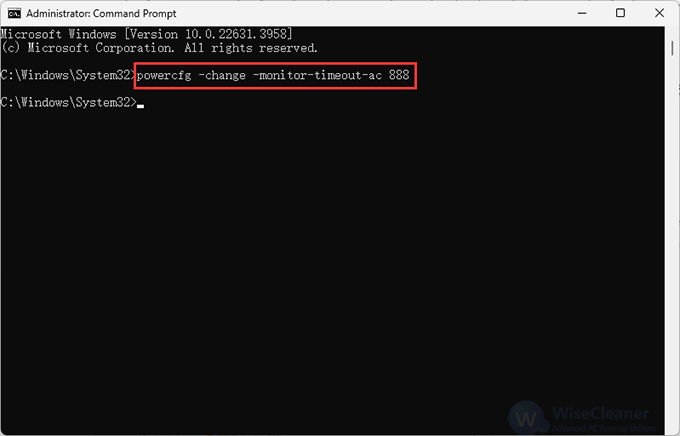
The first command is for when the PC is plugged in (-ac), and the second is for battery use (-dc).
Caution: Modifying the registry can have serious consequences if not done correctly. So please back up the registry before you use this method.
1. Press Win + R to open the Run dialogue, type regedit, and hit Enter.
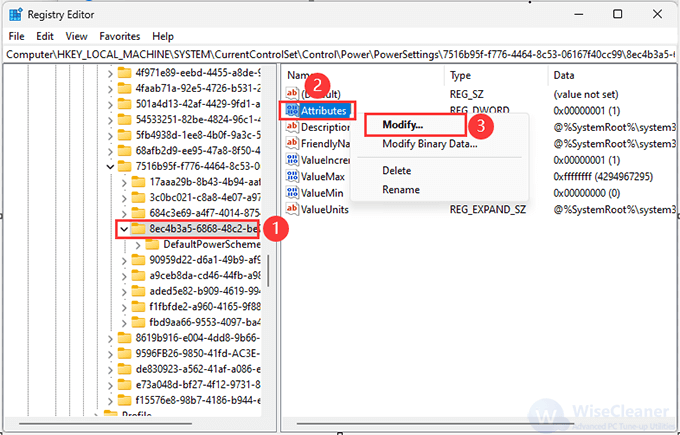
2. Navigate to the following key: HKEY_LOCAL_MACHINESYSTEMCurrentControlSetControlPowerPowerSettings�6b95f-f776-4464-8c53-06167f40cc998ec4b3fa-8773-4b66-8dfb-aa55f5d68cf7.
3. Right-click on Attributes, then select Modify.
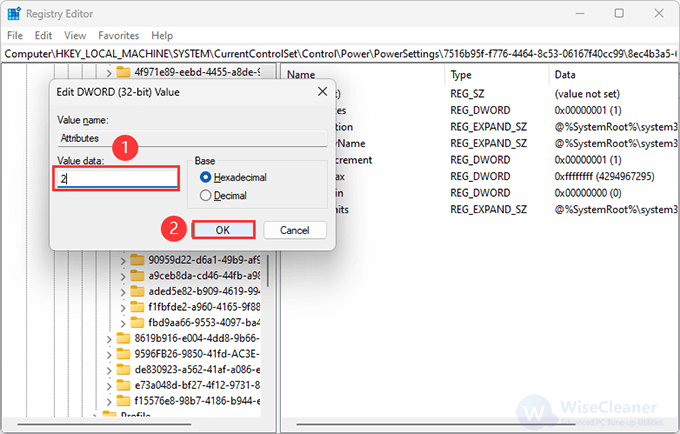
4. Change Value data from 1 to 2.
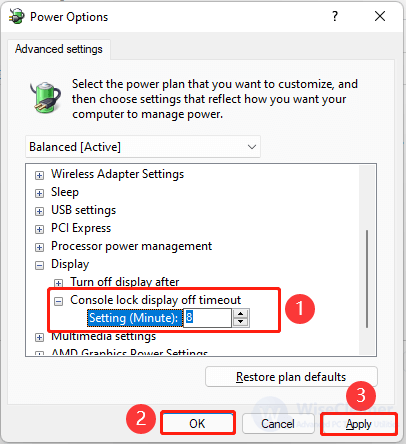
5. After this change, you need to navigate back to the Power Options in Control Panel (as in Method 2) to do further steps as below:
Understanding and managing your lock screen timeout settings in Windows 11 can be a small but significant step toward enhancing your computer’s security and efficiency. Whether you choose a longer duration for convenience or a shorter one for security, these adjustments are easily accomplished through the various methods outlined above.
wisecleaner uses cookies to improve content and ensure you get the best experience on our website. Continue to browse our website agreeing to our privacy policy.
I Accept