WiseCleaner Think Tank
Encounter difficult computer problems?
All about maintenance and optimization of your Windows System.
Aug 6, 2024
Encountering an Access Denied error on Windows 11 can be frustrating, especially when you need to access a file or directory critical to your work. This error typically occurs due to insufficient permissions, a corrupted user profile, or security settings. Fortunately, there are several methods to resolve this issue and regain access to the desired resources.
The Access Denied error generally surfaces when the operating system blocks a user or application from accessing a file, folder, or specific system resource. The most common reasons for this error include:
Here are several tried-and-true methods to tackle the Access Denied error in Windows 11.
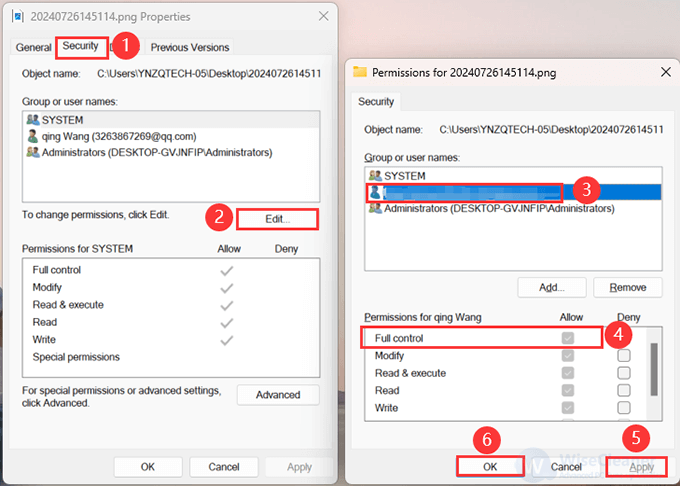
To access a file or folder, you'll need the correct permissions. Here's how to check and modify them:
1. Right-click on the file or folder causing the error.
2. Select Properties from the context menu.
3. Navigate to the Security tab.
4. Click on the Edit button to change permissions.
5. Select your user account and ensure that the Full control checkbox is checked, click Apply, and then OK.
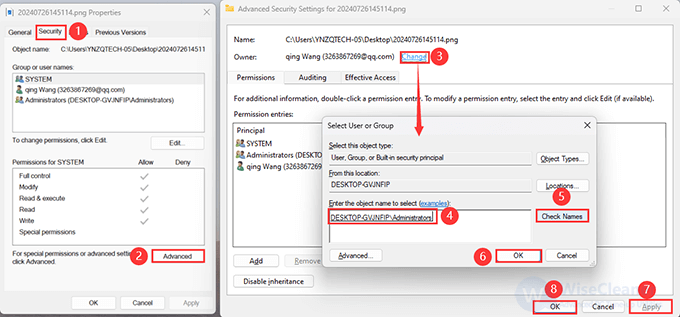
If the original owner of the file or folder is no longer available, you may need to take ownership.
1. Right-click on the file or folder and select Properties.
2. Go to the Security tab and click on Advanced.
3. In the Advanced Security Settings window, click on Change next to the Owner field.
4. Enter your username in the Enter the object name to select box, then click Check Names and OK.
5. Click Apply and then OK.
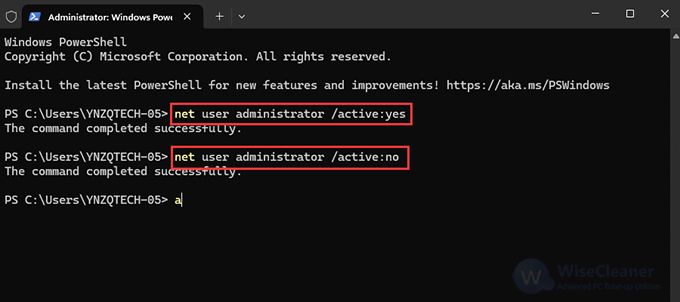
Windows 11 includes a hidden Administrator account with higher privileges. Enabling this account can help you bypass access restrictions.
1. Press Win + X and select Windows Terminal (Admin) from the menu.
2. Type the following command and press Enter:
net user administrator /active:yes
3. Log out of your current account and log in to the Administrator account.
4. Access the file or folder as needed.
5. To disable the account later, use the command:
net user administrator /active:no
Security software can occasionally misinterpret legitimate actions as threats, leading to access issues. Temporarily disable your antivirus or firewall to see if it resolves the problem.
1. Open your security software.
2. Locate the option to disable it temporarily (usually found in settings or options).
3. Try accessing the file or folder again.
Remember to re-enable your security software after troubleshooting to ensure continued protection.
If the error started recently, performing a system restore can revert your system to a previous state when the issue was not present.
1. Press Win + R, type rstrui.exe, and press Enter to open the System Restore wizard.
2. Follow the prompts to choose a restore point before the Access Denied error starts occurring.

3. Complete the restoration process and check if the error is resolved.
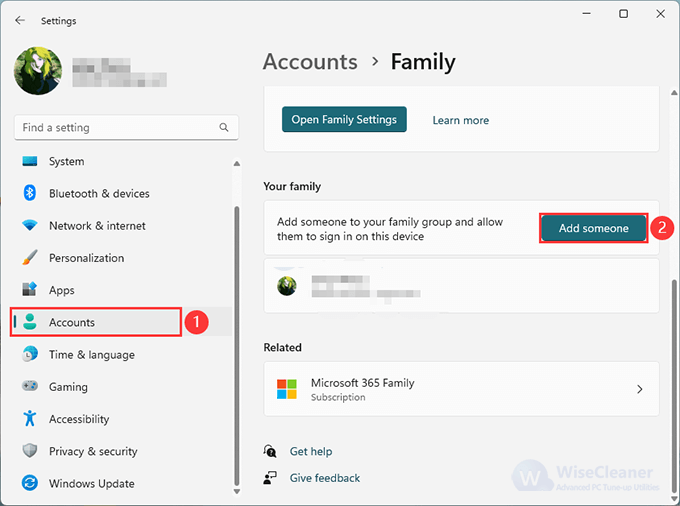
Corrupted user profiles can cause access issues. Creating a new user account can help.
1. Open Settings by pressing Win + I.
2. Navigate to Accounts > Family & other users.
3. Click on Add account under Other users.
4. Follow the prompts to create a new user account.
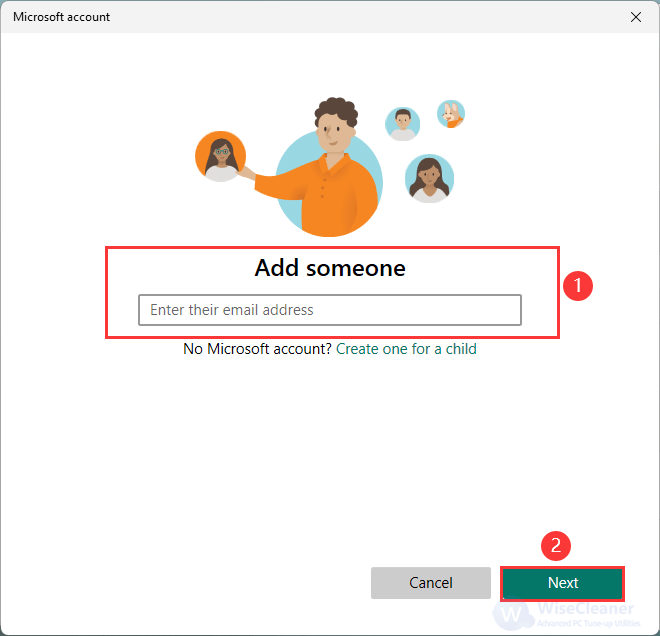
5. Log in to the new account and try accessing the file or folder.
The Access Denied error on Windows 11 can stem from various causes, but with the right approach, you can resolve it efficiently. By checking permissions, changing ownership, and using the Administrator account, you can tackle this error head-on.