WiseCleaner Think Tank
Encounter difficult computer problems?
All about maintenance and optimization of your Windows System.
Jun 12, 2024
Whether you're playing a game, creating a how-to video, or cooking up something for YouTube, you might want to record your screen activity in Windows. In addition to recording the screen, and depending on the app you use, you can also record the system audio from your computer and external audio from a microphone.
As we all know, the Snipping Tool is the native screen capture and video recording tool in Windows 11. And now, Microsoft has added an audio capture feature along with video in the Windows Insider channel, making it more practical for users.
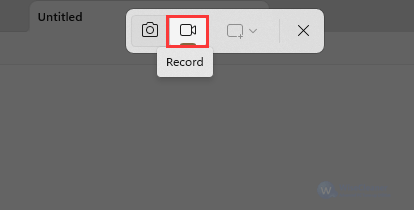
Press the Win + Shift + S keyboard shortcut to open the Snipping Tool, and click on the video record icon to highlight the area you want to record.
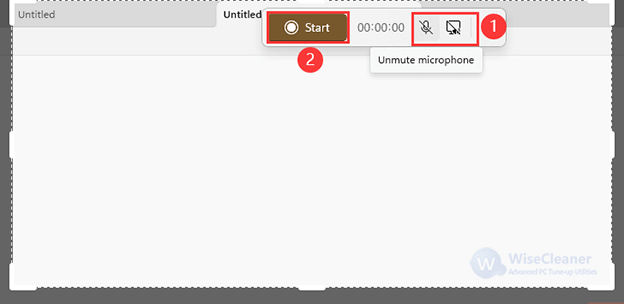
You will notice two new icons in the top bar alongside the timer and Start button, which allows you to control the microphone audio recording and system audio recording. Click on the microphone icon to enable it if it is muted. You can also unmute the system audio using the same steps. Then, click the Start button to record the screen.
Once done, click on the stop recording icon. Then the video will be opened directly from the Snipping Tool. Press Ctrl + S to save it.
Although the Game Bar video-capture tool is designed to record gameplay on Windows, it is a versatile tool that will capture just about any other type of screen activity except desktop and File Explorer.
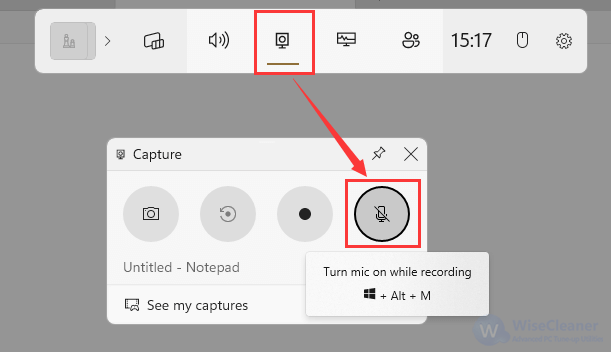
Press Win + G on your keyboard to open the Game Bar.
Click the Capture icon from the toolbar at the top of the window. You will see a microphone icon beside the Start recording button on the Capture prompt. Click on it to turn it on if it is disabled.
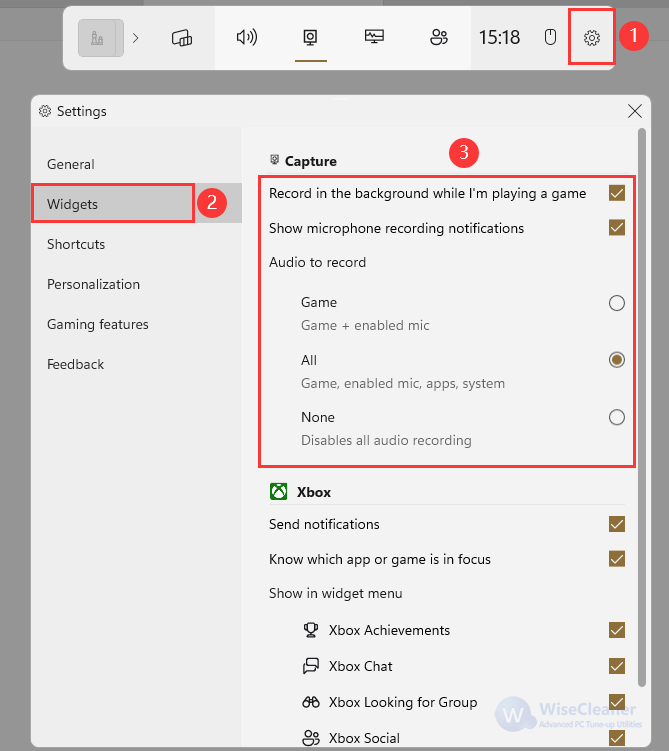
If you want to set the audio recording method as you desire, click the Settings gear in the top toolbar, then select Widgets in the left pane to configure the audio recording feature.
Once you have done the settings, close the Settings window, open the app or game you want to record, and press Win + Alt + R to get started.
The recording window will appear in the upper-right corner of the screen indicating that your screen is being recorded. To finish recording, select the Stop Recording button or press Win + Alt + R.
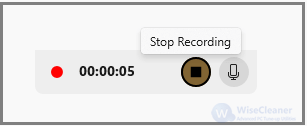
Then, you can review the recording by clicking the pop-up notification.

The third option is to use the screen recorder in Microsoft PowerPoint. You'll need a Microsoft 365 subscription to use the feature.
Open the Microsoft PowerPoint and set up a blank presentation. You can open one of your presentations as well.
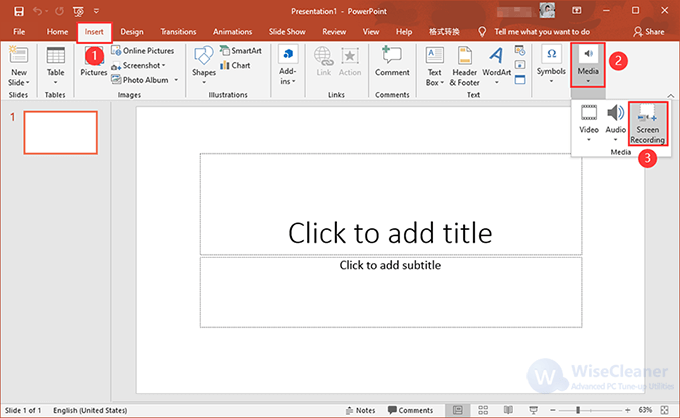
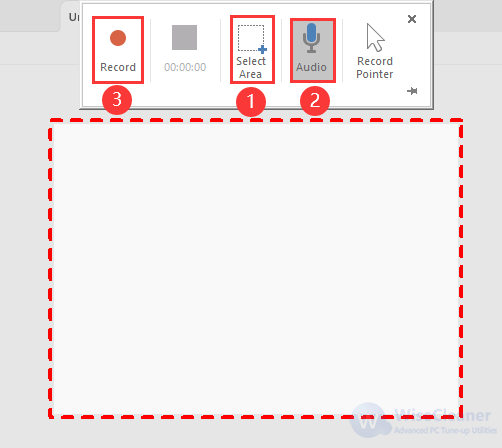
Click the Insert tab and select Media part to click the Screen Recording option. Tap on Select Area in the screen recorder window, then click and drag over the area you want to capture. You can also press Win + Shift + A to do that.
Click the Record button or press Win + Shift + R to begin the recording. It is recommended to disable the Record Pointer to hide the mouse cursor.
Press Win + Shift + Q to stop the recording. Then, the recording will be opened directly from PowerPoint. You can right-click on it to save.
These three methods each have their strong points, but when you are familiar with their keyboard shortcuts, things will become easier. Mastering several ways to record screens with audio could be useful at least you will not lose your head when you need to do so.