Windows Defender is the security application that Microsoft puts in every version of Windows. Sometimes, you may want to turn it off to perform certain tasks that Windows Defender may interfere with, or you plan to install other anti-virus applications. In this article, I will show you how to turn off Windows Defender in Windows 10.
Method 1: Turn off windows defender temporarily
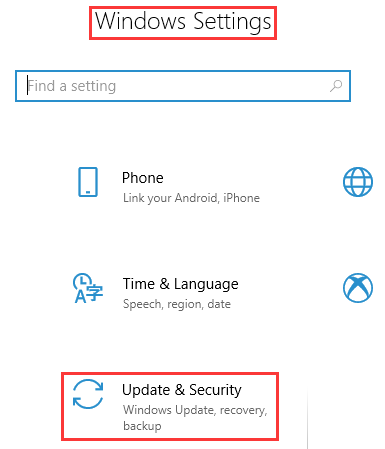
Step 1. Open Windows Settings
Please press Win + i to open Settings. And then choose Update & Security.
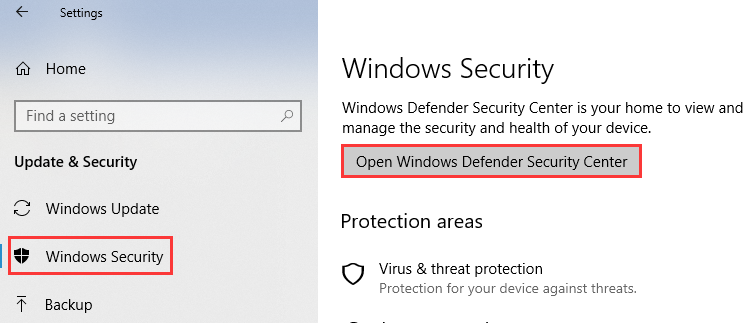
Step 2. Open Windows Defender
Select Windows Security from the left pane and choose Open Windows Defender Security Center.
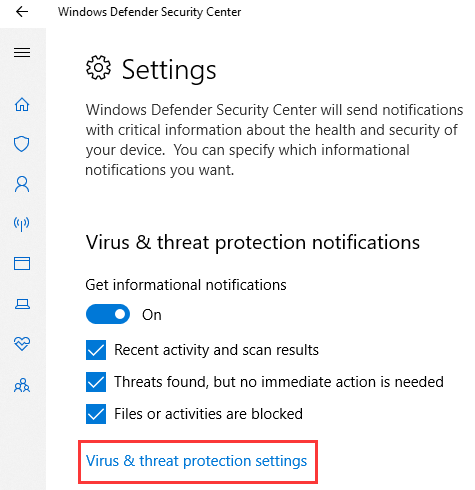
Step 3. Open Settings
Open Windows Defender’s settings, and then click on the Virus & Threat Protection settings link.
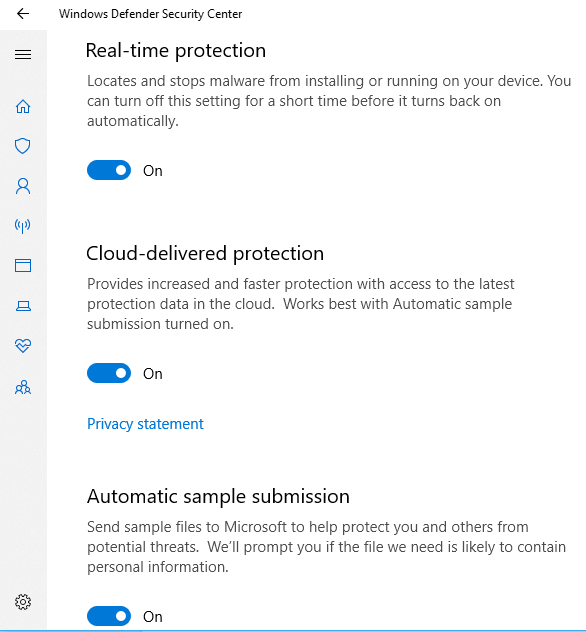
Step 4. Disable the Real-time Protection
Click the Real-Time Protection, Cloud-Delivered Protection, and Automatic Sample Submission switches to turn Windows Defender off.
Method 2: Using Group Policy to disable Windows Defender
Step 1. Open Group Policy console
Press Win + r to open the Run window, and type gpedit.msc, then hit Enter or OK.

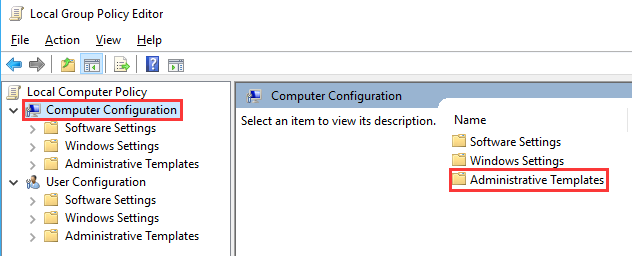
Step 2. Go to Administrative Templates.
Click on Computer Configuration and Administrative Templates.
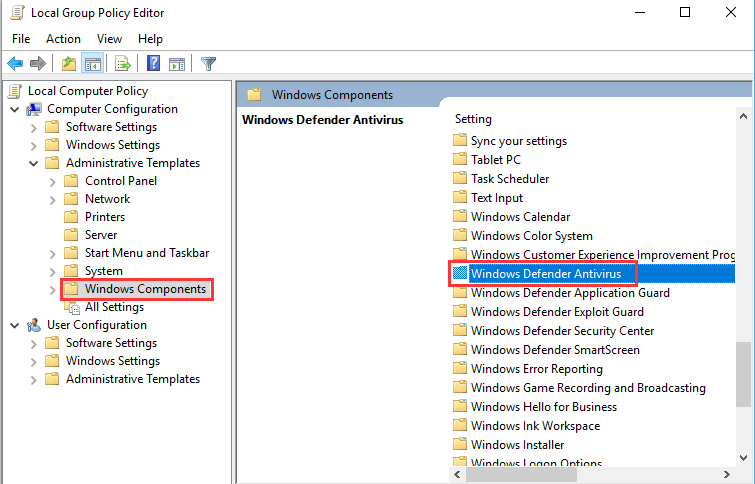
Step 3. Find Windows Defender Antivirus
Click on Windows Components and double-click Windows Defender Antivirus.
Step 4. Disable Windows Defender
Double click Turn off Windows Defender Antivirus.
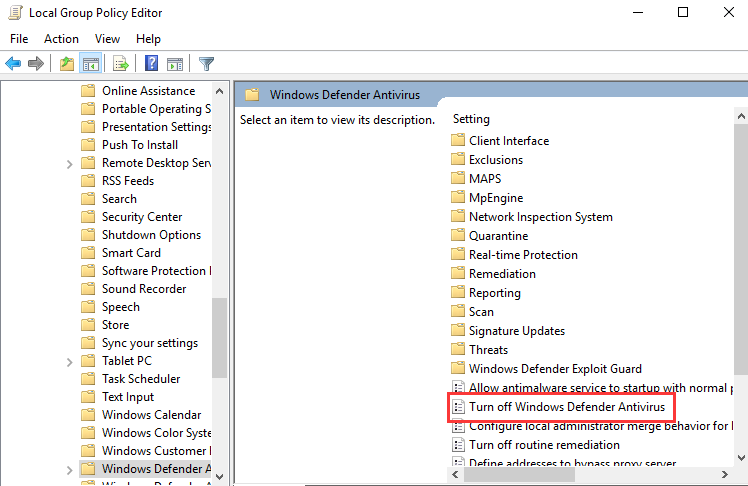
At last, select the Enable button on the left edge and click OK.
But without the protection of Windows Defender, your computer may be in some threat, so you need to install some powerful third-party program instead. Wise Anti Malware not only fully protects your computer from malware, but also does a better job of cleaning and optimizing. Have a try!
